What Causes Home Air Filters to Turn Black? A Practical Troubleshooting Guide
Learn why home air filters turn black, from dust and soot to moisture and mold. This Air Filter Zone guide covers causes, quick fixes, diagnostics, and prevention to keep your air clean.

A blackened filter usually signals a heavy load of particulates, moisture-related growth, or accidental exposure to smoke and cooking byproducts. In many cases, multiple factors work together—dust, humidity, and an undersized or mismatched filter are common culprits. Replace the filter with the right rating, seal the housing, and address the source of particulates to restore clean airflow.
What causes home air filters to turn black
Color change on an air filter is a visible clue that your filtration system is catching more than clean air. In many homes, a blackened filter signals a high load of dust, soot, mold spores, moisture issues, or kitchen and tobacco byproducts entering the system. According to Air Filter Zone, rapid darkening is usually driven by several interacting factors: excessive indoor particulates, humidity, and the wrong filter choice for the system. The Air Filter Zone team found that homeowners often misinterpret color changes as a single cause; in reality, multiple sources contribute to the issue. This is why a systematic approach works best—start with the simplest explanations and escalate only as needed.
Common sources of blackening: dust and soot
Dust accumulation is the most frequent reason filters darken quickly. In busy homes, high foot traffic, pet dander, and frequent door opening can pull in outdoor dust that clings to the filter media. Soot from candles, fireplaces, or limited kitchen ventilation also darkens filters, especially when a high-efficiency filter is used in a compact return air path. In older homes with leaky ducts, outdoor pollutants may bypass filtration entirely, showing up as black particles on the filter. If you notice a strong smoky or acrid odor accompanying the color change, treat this as a red flag and inspect for potential smoke sources nearby.
Mold, mildew, and moisture indicators
Damp environments are a prime breeding ground for mold and mildew, especially in bathrooms, basements, or areas with poor humidity control. Black or dark green flecks on a filter often point to fungal growth that has infiltrated return air. Moisture entering the system—from leaks, condensation, or humid climates—can also saturate the filter, turning it dark and sometimes producing a musty smell. If you suspect mold, do not simply replace the filter; arrange for a professional assessment of moisture sources and the HVAC enclosure.
Oil smoke, cooking byproducts, and indoor pollution
Kitchens can contribute oil-laden smoke and fine particulates to the air that filters rapidly. Over time, repeated cooking emissions accumulate on the filter, giving it a greasy sheen or dark color that may appear almost black. This is more common in homes with limited or poorly functioning range hoods or inadequate makeup air. In some cases, tobacco smoke or incense can also leave deeply pigmented residues on the filter. If these sources are ongoing, consider improving ventilation and using kitchen exhaust fans during high-emission activities.
Filter media and color change: what you can actually see vs what's inside
The visible darkening primarily reflects the surface load on the media. However, deeper layers can accumulate particulates not immediately obvious from the outside. A filter may look dark yet still perform adequately if the housing has proper airflow and there is no significant pressure drop. Conversely, a filter that looks pristine on the surface could be deeply clogged inside if the airflow path is restricted. It’s important to check not only color but also airflow and pressure readings if you have access to them.
How to inspect your filter safely
Before touching any part of the HVAC system, turn off power at the thermostat or service switch to prevent injury. Remove the filter and inspect for color, texture, and any moisture signs. If the filter is brittle or bristling with fibers, replace it. Check the housing for gaps around the frame and ensure the gasket is intact. If you notice persistent discoloration after replacement, investigate possible sources of contamination such as damp ductwork or a contaminated return area.
Reading the signs: when color means replace vs clean
In most residential setups, a noticeably blackened filter indicates the filter has reached the end of its effective life and should be replaced. Filters are typically single-use devices; cleaning reusable filters is only appropriate for specific materials per manufacturer instructions. If the building experiences frequent color changes, it may signal an underlying issue—insufficient filtration capacity, excessive indoor dust, or persistent moisture. When in doubt, replace the filter and monitor performance over a 2–4 week period.
Preventive strategies to minimize blackening
To reduce the rate at which filters turn black, maintain a consistent filtration strategy: choose the correct MERV rating for your system, keep outdoor air source clean, improve home humidity management with dehumidifiers, and seal ducts to minimize leakage. Schedule regular filter changes aligned with usage and environmental conditions. Air Filter Zone analysis shows that consistent maintenance and appropriate filtration are the most effective tools for preventing rapid darkening and preserving indoor air quality. Implementing a simple routine now can save money and hassle later.
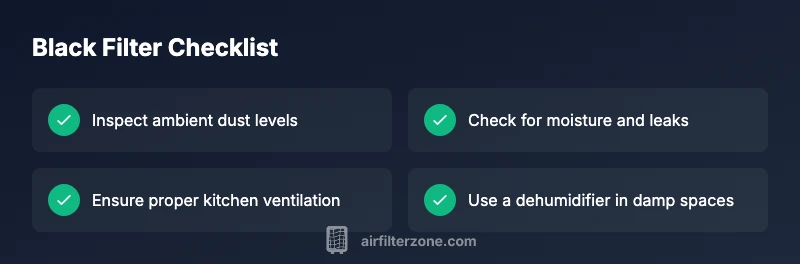
Quick-start checklist for busy households
- Replace the filter with the correct size and rating for your system.
- Inspect and seal the filter housing to prevent bypass.
- Check humidity levels and reduce excess moisture sources.
- Improve kitchen ventilation; use exhaust fans during cooking.
- Consider a professional duct inspection if discoloration recurs.
Steps
Estimated time: 30-60 minutes
- 1
Power down and locate the filter
Turn off the HVAC unit at the thermostat or service switch. Open the return air panel to locate the filter. Confirm the filter size and rating printed on the frame.
Tip: If you’re uncertain about the filter size, measure the existing frame from edge to edge. - 2
Remove, inspect, and replace
Carefully remove the old filter and inspect for color, texture, and moisture. If it’s dark or damp, replace it with a new filter rated for your system and ensure a snug fit with no gaps.
Tip: Do not reuse disposable filters; only reusable filters should be cleaned according to manufacturer instructions. - 3
Check housing and seals
Inspect the filter housing for cracks or gaps around the frame. Replace worn gaskets to prevent bypass air from skipping the filter media.
Tip: After installing the new filter, run the system and feel for air leaks around the edges. - 4
Assess moisture sources
Look for signs of moisture around ducts, condensate lines, or refrigerant leaks. Repair any leaks and run a dehumidifier in damp spaces to reduce mold risk.
Tip: Keep humidity between 30–50% to minimize mold growth and pigmenting on filters. - 5
Evaluate air quality and ventilation
Ensure kitchen and bathroom vent fans are functioning and exhausting to the outdoors. Improve outdoor air filtration by sealing exterior openings as needed.
Tip: Use a ceiling or inline fan to remove heavy smoke or cooking emissions efficiently. - 6
Monitor performance and adjust
After replacement, monitor airflow and any color-change reoccurrence over the next 2–4 weeks. If blackening persists, consider a duct inspection or higher-level filtration assessment.
Tip: Keep a simple log of filter changes and observed airflow changes to spot trends early.
Diagnosis: Filter turns black quickly after installation
Possible Causes
- highExcess indoor particulates from dust, dander, or outdoor pollutants
- mediumMoisture intrusion leading to mold or mildew
- lowCooking smoke, oil particles, or tobacco smoke entering the return air
- lowInadequate filtration or wrong MERV rating for the system
- lowLeaky ducts or bypass around the filter
Fixes
- easyReplace filter with correct size and MERV rating; reseal housing to stop bypass
- mediumAssess humidity; use dehumidifier or fix leaks to reduce moisture-related growth
- easyImprove kitchen ventilation and reduce indoor smoke sources
- hardSchedule professional duct inspection if discoloration recurs
- mediumAvoid high-MERV filters if your system cannot support them safely
FAQ
What are the most common causes of blackened home air filters?
The most common causes are heavy dust buildup, moisture issues leading to mold, and kitchen or tobacco smoke contributing particulates. In some cases, a mismatch of filter rating and system design can worsen the appearance. A systematic check helps identify which factor is dominant.
Common causes include heavy dust, moisture leading to mold, and cooking smoke. A proper inspection helps pinpoint the dominant factor.
Can a black filter indicate mold growing in my HVAC system?
Black discoloration can indicate mold, especially with moisture. Do not rely on color alone for diagnosis—test results or professional inspection are recommended if mold is suspected. Address moisture sources promptly to prevent growth.
Black color can signal mold, but you should get it tested or inspected by a professional.
Should I stop using my HVAC if the filter turns black?
Turn off or reduce operation and inspect the filter and housing. Running the system with a clogged or contaminated filter can worsen airflow and damage equipment. Replace the filter and check for sources of contaminants before resuming.
Turn the system off and inspect. Replace the filter before continuing.
Is upgrading to a higher-MERV filter safe for my system when filters turn black?
Only upgrade if your HVAC equipment supports the higher rating. A filter that’s too restrictive can reduce airflow and strain the blower. Consult the manufacturer guidance before changing filters.
Only if your system supports it; otherwise it can hurt airflow.
How often should I replace a blackened filter?
Replacement frequency depends on environment and usage. If discoloration recurs quickly, replace and monitor; use a schedule that aligns with your climate and indoor activities. Regular replacement is key to maintaining air quality.
Replace promptly and keep an ongoing replacement schedule.
Can I clean a filter to restore its color?
Most disposable filters aren’t designed to be cleaned. Reusable filters may be cleaned per manufacturer instructions; always ensure it dries completely before reinstallation. In most cases, replacement is safer and more effective.
Usually you should replace; only clean reusable ones per instructions.
Watch Video
Quick Summary
- Identify multiple causes, not a single source.
- Replace with the right filter and seal the housing.
- Manage humidity and ventilation to reduce color changes.
- Consider duct inspection if discoloration reoccurs.