How to Clean a Push Mower Air Filter: Step-by-Step Guide
Learn to clean a push mower air filter safely and effectively. This guide covers tools, steps, tips, and maintenance to keep your small-engine mower running smoothly.

Cleaning your push mower air filter restores airflow, improves engine performance, and helps prevent dirt from entering the combustion chamber. By following this guide, you’ll safely inspect, clean, or replace the filter and reassemble the air intake. You’ll need basic tools, patience, and a dry, dust-free workspace. Regular maintenance extends mower life and reduces fuel waste, smoke, and starting problems.
Why cleaning your push mower air filter matters
A clean air filter is the first line of defense against dust, grass clippings, and fine debris entering the engine. When the filter is clogged, the engine must work harder to draw in air, which can lead to a rich fuel mixture, reduced power, higher fuel consumption, and increased exhaust smoke. Regular cleaning or replacement helps maintain steady airflow, improves starting reliability, and minimizes engine wear over time. According to Air Filter Zone, routine air-filter maintenance for small engines begins with a clean, dry filter and timely replacement when damage or excessive wear is detected. This is especially true for push mowers used in dusty conditions or on loose soil.
In addition to performance, clean filters reduce the amount of abrasive particles reaching the carburetor and spark plug area. Keeping a dry, dust-free workspace during maintenance also minimizes re-contamination. If you’re new to mower maintenance, treat cleaning as a monthly task during heavy mowing seasons and every 3–6 months the rest of the year, depending on usage and conditions.
Understanding the types of air filters used in push mowers
Push mowers typically use one of two filter types: foam pre-filters and pleated paper or composite paper filters. Foam filters are washable; they trap particles while allowing air to pass through when properly dried. Paper filters are designed for single-use or limited washing and should be checked for tears or deformation before cleaning. Always consult your mower’s manual, but a general rule is: wash any foam element with mild soap and warm water, rinse thoroughly, and air-dry completely before reinstallation. If the filter is paper and looks dirty after a rinse, it’s safer to replace it rather than risking engine damage. Damaged or saturated filters reduce air flow and can cause a rich fuel mixture that fouls the spark plug over time.
Not all filters tolerate washing; some OEM filters are designed to be dry-cleaned only. If you’re unsure about your model, err on the side of replacement. This ensures optimal engine performance and helps protect the carburetor from grit and debris.
Tools and materials you’ll need (and why)
Having the right tools on hand makes the process quick and safe. Essential items include a small screwdriver to remove the air-filter cover, a clean rag to wipe dust, mild dish soap for foam filters, warm water for rinsing, a soft-bristle brush for stubborn dirt, compressed air (optional) for quick dust removal, and a replacement filter if the old one is damaged. Gloves protect your hands from sharp edges, and a clean, dry workspace reduces the risk of recontaminating the filter.
Tip: Lay out a shallow tray or mat to catch debris and to keep small parts organized. This helps avoid losing screws or springs during reassembly.
Cleaning methods: dry clean vs. wash (which to use and how)
Dry cleaning is suitable for lightly dirty filters and many paper filters that are not intended to be washed. Gently tap the filter over a trash can to release loose debris, then use a dry brush to loosen caked dirt. For foam or washable filters, wash with mild soap and warm water, rinse completely with clean water, and squeeze out excess moisture (do not wring). Allow the filter to air-dry in a warm, dry area away from direct heat. Do not use heat sources like a hair dryer, which may warp the filter material. Re-check for tears or deformities; damaged filters should be replaced rather than cleaned. When in doubt, refer to your mower’s manual for the recommended cleaning method and drying time.
Common mistakes and quick fixes
Common mistakes include washing a paper filter and then attempting to reuse it, using harsh chemicals, or reassembling before the filter is fully dry. These mistakes can cause structural damage or leave moisture that promotes mold growth. Quick fixes include inspecting for tears, replacing a wet or misshapen filter, and ensuring the air-intake housing is clean before reinstallation. If you’re reusing a filter that’s borderline, consider replacing it to maintain optimal engine performance and fuel efficiency.
Maintenance tips to extend filter life
To extend filter life, perform a visual inspection every mowing session and clean more often in dry, dusty conditions. Keep the air intake housing free of leaves and grass clippings, and store spare filters in a clean, dry location. If you notice frequent clogging, consider upgrading to a higher-grade filter that suits your climate and mowing conditions. Label filters with install dates so you can track replacement intervals. End-of-season maintenance should include a thorough check of the carburetor and spark plug to prevent buildup from dirty air entering the engine.
Tools & Materials
- Screwdriver (fit for your model)(Typically Phillips or flathead; check user manual)
- Clean rag(Lint-free to avoid leaving fibers in the filter)
- Mild dish soap(Used for washing foam filters)
- Warm water(Rinses soap from foam filters)
- Soft-bristle brush(Gently loosens dirt without tearing filter)
- Compressed air can (optional)(Blows out stubborn dust from pleated filters)
- Replacement filter(Have on hand in case of damage)
Steps
Estimated time: 25-40 minutes
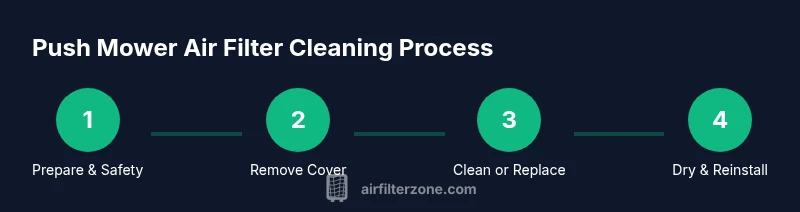
- 1
Power down and prepare
Park the mower on a flat, dry surface. Disconnect the spark plug wire to prevent accidental starting. Remove any loose debris from around the air intake area to avoid contaminating the filter during removal.
Tip: Work in a well-lit area and lay out a cloth to catch small screws or parts. - 2
Remove the air-filter cover
Use the screwdriver to unscrew the cover securing the air filter. Keep screws in a labeled container so you don’t lose them. Gently lift the cover away, exposing the filter element.
Tip: If screws resist, rotate slightly while loosening to avoid stripping the heads. - 3
Extract the filter element
Carefully remove the filter from its housing. Check for tears, heavy staining, or deformation. If the filter is paper and looks dirty after a gentle wipe, plan to replace it.
Tip: Handle the filter by its edges to avoid transferring oils from your fingers. - 4
Clean or wash the filter
For foam or washable filters, wash with mild soap and warm water, rinse, and press out excess moisture. For dry-clean-only filters, tap or brush to remove debris. Do not use harsh solvents.
Tip: Never wring a foam filter; it can damage the material and reduce filtering performance. - 5
Dry and inspect
Air-dry the filter completely in a warm, ventilated area. Check for color change, stiffness, or tears. If you see any damage, replace rather than reuse.
Tip: Dry time can take 30–60 minutes depending on humidity; ensure no moisture remains before reinstalling. - 6
Reinstall and test
Place the filter back in the housing, secure the cover with screws, reconnect the spark plug, and start the mower briefly to ensure smooth operation.
Tip: If engine runs roughly after restart, recheck the seal around the housing to prevent unfiltered air entry. - 7
Log maintenance and store
Record the date of cleaning or replacement. Store spare filters in a dry place and re-check during the next mowing season.
Tip: Create a simple maintenance calendar to track filter changes and mower servicing.
FAQ
How often should I clean the air filter on a push mower?
Clean or replace the air filter based on mowing conditions. In dusty environments, check weekly during peak season; in cleaner conditions, every 1–2 months is often sufficient. Always defer to the mower’s manual for model-specific guidance.
In dusty conditions, check weekly; otherwise, every 1–2 months is usually enough. Refer to your manual for model specifics.
Can I wash a paper filter with water?
Most paper filters are not designed to be washed. If the filter looks dirty after a light brush-off, replace it rather than attempting to wash and reuse. Check your mower’s manual for filter type and care instructions.
Most paper filters shouldn’t be washed. If it’s dirty after brushing, replace it.
What should I do if the filter is damaged after cleaning?
If you see tears, deformation, or limp edges, replace the filter. A damaged filter cannot properly seal the intake and may let dirt bypass the filtration system.
Damaged filters must be replaced to protect the engine.
Is it safe to run a mower without an air filter?
No. Running without an air filter allows unfiltered air and debris into the engine, increasing wear and risk of damage. Always reinstall a clean filter before starting.
Never run the mower without an air filter; it will damage the engine.
How can I tell if my filter needs replacement soon?
Look for frayed material, heavy staining, or reduced airflow when testing the unit. If you notice any of these signs or if the filter has exceeded the recommended replacement interval, it’s best to replace.
If you see fraying or heavy staining, replace the filter.
Watch Video
Quick Summary
- Inspect filters regularly and clean or replace as needed.
- Know your filter type to choose the correct cleaning method.
- Dry filters thoroughly before reassembly to protect the engine.
- Document maintenance to maintain predictable mower performance.