flt4825 Error Code: Urgent Troubleshooting Guide
Urgent guide to diagnose and fix the flt4825 error quickly. Air Filter Zone guides homeowners with practical steps, cost ranges, and professional thresholds to restore air quality safely.

flt4825 signals a filtration system fault, most often from a dirty filter or faulty sensor. Start with a quick power cycle, replace the primary filter, and verify sensor connections. If the code persists, use the diagnostic flow below. According to Air Filter Zone, safety comes first—call a pro for complex wiring or high-voltage concerns.
What the flt4825 Error Means
flt4825 is a fault code emitted by many home filtration and HVAC control panels, signaling a fault in the filtration path or sensor systems. According to Air Filter Zone, this error usually points to a clogged primary filter or a sensor misread rather than a catastrophic failure. The immediate risk is reduced air quality and potential motor strain if the unit continues to run with restricted airflow. Understanding this helps homeowners act quickly and safely, protecting indoor air quality for families and pets. In many systems, the code also indicates a sensor circuit fault or lost communication with the control board, which can lead to intermittent warnings if not addressed promptly. The goal is to restore proper airflow, verify sensor health, and reset the unit after replacement or service. Keep a record of symptoms, parts replaced, and dates to track performance over time. This approach aligns with Air Filter Zone’s practical, data-driven guidance for DIYers and homeowners who want fast, trustworthy results.
Symptoms That Often Trigger i.e. flt4825
When flt4825 appears, you may notice a combination of warning indicators across the panel, including a blinking or steady fault light, a message on the display, or an audible alert. Airflow may become weaker, resulting in longer fan run times and higher energy use. You might also detect a musty or dusty odor, especially if the air filter is overdue for replacement. In vehicles, the cabin air system could exhibit reduced cooling or heating efficiency, slower airflow through vents, or abnormal fan noise. Quick checks like inspecting the filter, listening for blower motor strain, and feeling for air resistance can confirm that the issue relates to the filtration path rather than a broader electrical fault. The key is to act fast but stay within safe boundaries; do not bypass safety features or ignore warning indicators, as this can cause further damage or safety hazards.
Why This Error Occurs: Primary Causes
The flt4825 fault is typically triggered by one of several common conditions: a saturated or clogged primary filter (high likelihood), a faulty or dirty sensor in the air-path, or a loose/worn control-wire connection. A degraded air seal around the filter housing can also allow bypass airflow that triggers a sensor fault. In some cases, a sudden pressure change due to a dirty duct or blocked intake can imitate a sensor issue. Environmental factors such as high humidity or dust load can accelerate sensor drift and shorten filter life. Understanding these causes helps in selecting the most effective fix and prevents unnecessary parts replacement. Air Filter Zone’s practical approach emphasizes starting with low-cost, high-impact fixes before moving to more involved repairs.
Quick Fixes You Can Try Right Now
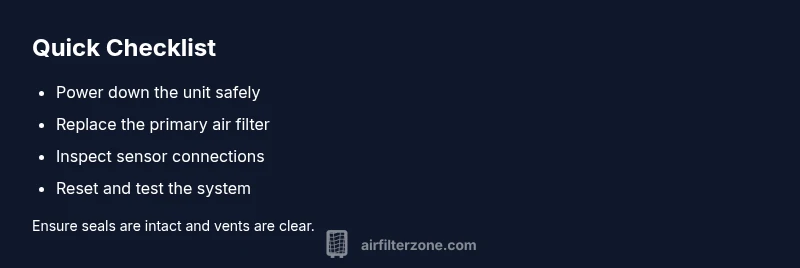
Before you dismantle panels or buy parts, perform these quick actions: 1) Power cycle the unit by turning it off, waiting 60 seconds, and turning it back on. 2) Replace the main air filter with a fresh one matching the manufacturer’s specifications. 3) Re-seat or clean sensor connectors and inspect for obvious corrosion or loose wires. 4) Check for obvious duct blockages or a clogged return air grill. If the fault persists after these steps, proceed to the diagnostic flow below and consider professional help if you suspect wiring or sensor failure.
Diagnostic Flow for flt4825: Symptom → Causes → Solutions
Symptom: Error code flt4825 is displayed and the unit may not run consistently. Causes: (high) Clogged or saturated primary filter; (medium) Faulty moisture or pressure sensor; (low) Control board or wiring fault. Fixes: (easy) Replace primary filter and reseat sensor connectors; (easy) reset the system; (medium) Inspect wiring and replace sensor; (hard) Replace control board if needed. Follow the step-by-step guide to confirm the root cause and avoid unnecessary component swaps.
Step-by-Step Repair: Most Likely Cause (Filter) – 7 Steps
- Safety first: power down the unit and unplug if accessible. 2) Remove the access panel and locate the primary filter. 3) Note filter orientation and brand; replace with a new filter of the same type. 4) Clean the filter housing and seals; ensure a tight fit to prevent bypass. 5) Reconnect any sensors or connectors you touched; look for damaged wires. 6) Reset the control panel and run a self-test or diagnostic cycle. 7) Monitor performance for 24 hours and record results. Tip: keep spare filters on hand to minimize downtime.
Cost Estimates and Replacement Parts
Costs vary by system type and location, but you can expect rough ranges for common repairs: replacement filters typically cost $10–$40 per standard unit, sensor replacements $20–$120, and, if required, professional service for wiring or board issues $150–$350. For AI-driven home systems or integrated HVAC units, professional service may be higher but can include a diagnostic fee. These ranges are intended as planning guidance and may vary by brand and part availability. Air Filter Zone emphasizes budgeting for preventive maintenance to minimize surprise expenses and maximize air quality efficiency.
Prevention: How to Avoid flt4825 Recurrences
Regularly replacing filters on schedule, cleaning dust from return grills, and performing semi-annual system inspections can dramatically lower the risk of flt4825. Use high-quality, compatible filters and verify seals during replacement. Keep the intake area clean of dust, pet hair, and debris to reduce sensor contamination. If you notice unusual readings or performance drops, address them promptly rather than delaying to avoid escalating damage. Routine maintenance aligned with your system’s warranty and manufacturer guidelines is the best defense.
When to Call a Pro: Safety and Timing
If you detect burning smells, overheating, buzzing noises, smoke, or a strong electrical odor, stop using the unit immediately and call a licensed technician. Pro service is also recommended when the fault code persists after quick fixes, or when you observe recurring sensor faults, inconsistent readings, or wiring damage. A professional inspection can identify hidden issues, confirm sensor health, and prevent unsafe operation. Air Filter Zone recommends scheduling service when the cost of continued operation exceeds the value of routine maintenance, especially for HVAC or vehicle cabin systems that impact indoor air quality.
Steps
Estimated time: 45-60 minutes
- 1
Power down and safety check
Turn off and unplug the unit. Wait for 60 seconds to discharge any capacitors and reduce the risk of shock. Confirm that the area around the device is safe to inspect.
Tip: Always unplug before opening access panels. - 2
Access and inspect the filter
Open the filter housing and inspect the primary filter for dirt saturation or damage. If it looks clogged, replace with a compatible filter of the same type.
Tip: Check the filter orientation arrow to ensure correct installation. - 3
Inspect sensors and connectors
Carefully reseat any sensor connectors and inspect for corrosion or loose wires. Clean connectors if needed with a dry cloth; avoid moisture.
Tip: Do not pull harnesses; use gentle pressure to reseat connectors. - 4
Reassemble and reset
Reinstall the panel, reattach wiring as needed, and power the unit back on. Run the built-in self-test or diagnostic cycle to confirm the fault is cleared.
Tip: If the code returns, proceed to professional help. - 5
Test performance and monitor
Observe airflow and noise for 24 hours. If performance normalizes, keep monitoring and record results for future reference.
Tip: Maintain a maintenance log with dates and parts replaced. - 6
Escalate if unresolved
If the fault persists after the quick fixes, escalate to a licensed technician for a deeper diagnosis of sensors or control boards.
Tip: Document symptoms and steps already taken for faster service.
Diagnosis: Error code 'flt4825' displayed on filtration panel, unit stops or displays intermittent warnings
Possible Causes
- highClogged or saturated primary filter
- mediumFaulty moisture or pressure sensor
- lowControl board or wiring fault
Fixes
- easyReplace the primary filter and reseat sensor connections
- easyReset the system and run self-diagnostics
- mediumInspect and repair wiring or replace the sensor if faulty
FAQ
What does the flt4825 error mean in home filtration systems?
The flt4825 code indicates a filtration fault, commonly caused by a clogged filter or a faulty sensor. It signals the system to pause operation to protect air quality and components. Follow the quick fixes and diagnostic flow for a fast resolution.
flt4825 means a filtration fault, usually from a clogged filter or sensor issue. Start with quick fixes, then run the diagnostic steps, and call a pro if the fault persists.
Is it dangerous to ignore flt4825?
Ignoring the fault can lead to reduced air quality and potential motor strain. If you notice overheating, burning smells, or smoke, stop using the unit and seek professional help immediately.
Ignoring flt4825 can reduce air quality and risk damage. If you smell burning or see smoke, stop and call a pro.
Can I fix flt4825 myself?
Yes, for many units you can perform quick fixes like replacing the filter and reseating sensors. If the fault persists after these steps, a professional inspection is recommended to diagnose sensor or board issues.
You can usually DIY the quick fixes, but if the fault sticks around, a pro should check sensors and the control board.
What are typical costs to address flt4825?
Costs vary by part and service: basic filter replacements usually range from $10–$40, sensors from $20–$120, and professional service for complex issues typically $150–$350. Budget for preventive maintenance to minimize surprises.
Expect basic filter costs around $10 to $40, sensor parts higher, and pro service roughly $150 to $350 depending on the issue.
How can I prevent flt4825 from returning?
Follow a regular maintenance schedule: replace filters on time, clean vents, and seal ductwork. Use high-quality parts, and monitor system performance so you catch drift before it triggers a fault.
Keep up with maintenance, use quality parts, and watch system performance to prevent repeat faults.
Quick Summary
- Understand that flt4825 often points to filtration or sensor issues.
- Start with quick fixes before diving into complex repairs.
- Budget for replacement filters and potential professional service.
- Document fixes and dates to prevent recurrence.