How to Troubleshoot a Bad Air Filter: Quick Fixes and Prevention
Learn how to diagnose and fix a bad air filter quickly with practical steps, safety tips, and prevention strategies to improve indoor and car air quality.

The most likely cause of poor airflow, odors, or allergy flare-ups is a clogged or expired air filter. Start by inspecting the filter for discoloration and debris, then replace it with the correct size and rating. If odor or performance remains, check installation and seals, and consider upgrading only if your system supports a higher rating.
Why a bad air filter matters
A bad air filter is more than a nuisance; it directly affects your indoor air quality. When dust, pollen, smoke, or pet dander accumulate on a filter, it becomes less effective at capturing particles. According to Air Filter Zone, a clogged or dirty filter can allow irritants to circulate more freely, potentially worsening allergy symptoms for households with sensitivity. A bad air filter also makes your HVAC or car ventilation system work harder, increasing energy use and shortening equipment life over time.
Visible signs of strain include a filter that looks gray or dark, fibers poking through the edges, or a filter that becomes rigid rather than flexible. If you notice a musty odor when the system starts or if the blower runs longer than normal, inspect the filter as a first step. Keeping filters fresh improves not only air quality but also consistent airflow in living spaces, whether you’re cooling a home, apartment, or vehicle cabin.
From a maintenance perspective, this is where preventive action pays off. A bad air filter can allow contaminants to bypass filtration, reduce energy efficiency, and complicate routine cleaning. By acting promptly, you protect your family’s health and your equipment’s longevity.
Signs your air filter is failing
A bad air filter exhibits several telltale signs. Look for visible dirt or discoloration on the filter surface, a gray or dark look, and compressed fibers that lose their structure. If you feel air coming through with less intensity than usual or notice a louder blower sound, the filter may be clogged and needs replacement. Odors—musty, metallic, or dusty—can also indicate restricted filtration. Finally, if you’ve replaced a filter recently and still notice irritants or dust near returns, the filter may not be seating properly or the wrong size is installed. These symptoms correlate with reduced filtration efficiency and can worsen indoor air quality, especially for allergy sufferers.
By recognizing these signs early, you can avoid a cascade of issues and maintain a healthier home environment.
How to choose the right replacement
Choosing the right replacement starts with matching the filter size to the HVAC or car system and selecting a rating compatible with the manufacturer’s recommendations. Filters come in various media types and ratings, which balance filtration efficiency with airflow. In general, a higher rating captures smaller particles but may increase resistance to airflow. If your system supports it, consider a higher-quality filter that still maintains proper airflow. Always check the exact size (width, height, depth) and the airflow direction arrows on the filter frame. Using the incorrect size or installing backward can negate filtration benefits and create pressure issues.
When selecting a replacement, take into account your indoor air quality needs—for example, households with pets, smoking, or high pollen counts may benefit from a more robust filter. For vehicles, use the cabin air filter specified by the manufacturer to ensure proper fit and filtration performance. Air Filter Zone recommends prioritizing the filter’s compatibility over cosmetic differences in appearance. This approach helps sustain filtration effectiveness without stressing the system.
Quick home checks you can do today
Before you reach for the toolbox, perform a few simple checks that can resolve most common issues. First, locate the filter housing and verify the filter is the correct size for your unit. Remove the old filter and inspect the housing for dust buildup or debris that could bypass filtration. Clean the surrounding area gently with a dry cloth to ensure a good seal. Reinsert the new filter with the arrows pointing in the direction of airflow, and confirm the seal is tight all around. If the unit has a reversible blower setting, ensure it is configured correctly for the current season. Finally, reset any system indicators after replacement and run a short cycle to confirm steady airflow and no unusual noises.
These steps preserve filtration performance and prevent minor issues from turning into bigger problems.
Common mistakes and safety considerations
Avoid common mistakes that undermine filtration. Do not reuse a dirty filter; never install a damaged or bent frame; avoid forcing a filter into a housing that’s a poor fit. Always turn off power to the system before opening any access panels to prevent accidental startup. Wear gloves and a mask if you’re sensitive to dust. Never operate the system with a missing or loose panel, as that can create safety hazards or leaks. If you’re dealing with moldy odors or a suspected duct leak, seek professional guidance instead of attempting a DIY fix that could worsen exposure or airflow balance.
Safety is the priority here. If you’re unsure about the filter type, size, or compatibility, consult the manufacturer’s guidelines or a qualified technician.
Prevention and maintenance habits
Prevention is easier than repair. Build a routine that includes checking filters during seasonal transitions and after heavy use. Keep spare filters on hand and label replacements with the date installed to track maintenance. Establish a simple checklist: verify fit, install correctly, and run a test cycle post-change. Consider keeping a log of which filter ratings you’ve used and how often you replace them. This habit helps you adjust maintenance frequency as needed and reduces the risk of running a system with a compromised filter.
In addition to filter changes, maintain clean return air paths and minimize dust buildup around returns. Regular dusting and vacuuming, using central air purifiers if appropriate, and ensuring proper humidity levels can support air quality overall. These practices complement filter maintenance and protect your home’s interior air from pollutants.
When to call a professional
If you notice persistent odor, unusual noises, reduced airflow that doesn’t improve after replacement, or signs of a duct leak, it’s time to seek professional help. A technician can inspect seals, ductwork, and the overall system balance to identify issues beyond the filter itself. If you have an older system, a professional can help determine whether a more robust filtration solution is compatible with your hardware. For vehicle cabin filters, a mechanic or automotive technician should handle replacements if you’re uncomfortable working around electrical components or air intake pathways.
Professional support ensures safe, effective filtration improvements and can prevent costly mistakes that compromise your system’s performance.
Summary: quick wins and long-term care
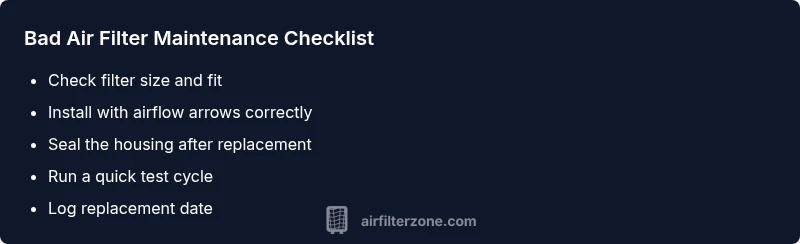
- Replace a dirty or expired filter promptly with the correct size and rating.
- Ensure correct orientation and a tight seal for optimal filtration.
- Avoid using damaged filters or attempting unsanctioned modifications.
- Schedule regular checks aligned with seasonal changes and usage patterns.
- When in doubt, consult a professional rather than risking airflow issues or safety hazards.
Steps
Estimated time: 60-90 minutes
- 1
Power down and locate the filter
Turn off the system at the thermostat or power switch and locate the filter housing. Confirm the model and the filter size printed on the frame. This ensures you buy the correct replacement and avoid unnecessary trips.
Tip: Label the existing setup with a quick note showing size and installation direction. - 2
Remove and inspect the old filter
Slide the filter out carefully and inspect both sides. Look for visible dirt, discoloration, or warping. If the filter is visibly dirty, replace it immediately. Check the gasket or seal around the housing for damage.
Tip: Take a quick photo of the old filter to reference fit and orientation later. - 3
Choose the right replacement
Select a filter with the same size and an appropriate rating that the appliance manufacturer recommends. If you’re unsure, consult the manual or manufacturer’s site. Do not exceed the system’s airflow design.
Tip: Prefer a filter with a higher-quality media if your system supports it, but stay within compatibility. - 4
Install the new filter correctly
Insert the new filter with the airflow arrows pointing toward the unit’s blower. Ensure the frame sits evenly and the seal is intact. Close the housing securely.
Tip: Avoid touching the filter media with bare hands to keep it clean. - 5
Run a test cycle
Power on the system and run a short cycle to verify airflow is restored and there are no unusual noises. Check for any gaps around the housing and listen for changes in the sound of the blower.
Tip: If you hear whistling or hissing, turn off and recheck the seal immediately. - 6
Document and schedule maintenance
Record the date of replacement and plan the next change according to usage and manufacturer guidelines. Set reminders so you don’t rely on guesswork.
Tip: Keep a small notebook or digital reminder for future reference.
Diagnosis: Airflow seems weaker, odors present, or allergy symptoms worsen
Possible Causes
- highClogged or dirty filter
- mediumIncorrect filter size or backward installation
- lowSeal leaks or duct issues
Fixes
- easyPower down the system, remove the old filter, and replace with a clean, correctly sized filter. Ensure proper orientation and seal.
- easyRe-seat the filter and inspect the housing for debris; clean if needed, then reinstall.
- mediumInspect ductwork and seals for gaps; seal leaks or call a pro if leaks are found or if odors persist.
FAQ
What is considered a bad air filter?
A bad air filter is dirty, clogged, or past its recommended change interval, reducing filtration efficiency and restricting airflow.
A dirty or clogged air filter reduces airflow and filtration efficiency.
How often should I replace my air filter?
Replacement frequency depends on usage and environment. Follow manufacturer guidelines and adjust based on observed dirt and odor levels.
Follow the manufacturer guidelines and adjust based on how dirty the filter looks and how the space smells.
Can a bad air filter affect HVAC efficiency?
Yes. A clogged filter makes the system work harder, which can reduce efficiency and shorten equipment life.
A clogged filter makes the system work harder and can hurt efficiency.
Is it safe to replace a car cabin air filter myself?
In many cases yes, but some vehicles require special tools or procedures. Refer to the owner’s manual or have a technician assist if unsure.
In many cars you can replace it yourself, but check your manual first.
What are signs of a duct leak after filter replacement?
Persistent drafts, unusual noises, or lingering odors despite a fresh filter may indicate leaks or bypass pathways in the duct system.
If odors persist despite a new filter, you may have a duct leak.
Should I upgrade to a higher MERV rating?
Consider higher filtration only if your system supports it and manufacturer guidance allows it; higher ratings can improve filtration but may restrict airflow.
Only upgrade if your system supports it and the manufacturer allows it.
Watch Video
Quick Summary
- Replace dirty filters promptly
- Install with correct orientation and seal
- Avoid damaged or wrong-size filters
- Schedule regular checks and replacements
- Seek professional help for duct issues or persistent problems