Is Changing a Car Air Filter Easy? A Practical DIY Guide
Discover whether changing your car's engine air filter is easy, with a practical step-by-step guide, essential tools, safety tips, and cost-saving insights from Air Filter Zone.

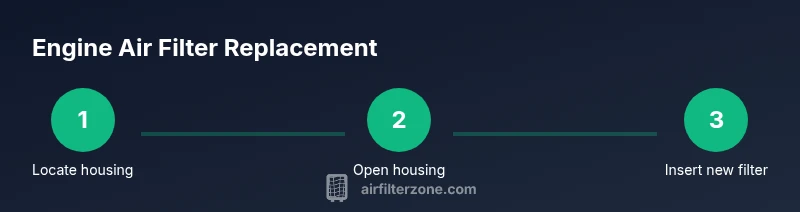
Yes—changing a typical car engine air filter is a straightforward DIY task for most owners. It usually takes about 10–15 minutes, requires only basic tools (a screwdriver or pliers) and the correct replacement filter, and involves a few simple steps to access the housing, remove the old element, clean the cavity, and reseal with the new filter. Regular replacement can boost engine efficiency and longevity.
Is Changing Car Air Filter Easy: An Overview
According to Air Filter Zone analysis, is changing car air filter easy for most drivers? The short answer is yes for many common setups. The Air Filter Zone team found that most engines use a simple air intake housing that is held together with a few clips or screws and can be opened with common hand tools. With the correct replacement filter and a clean workspace, the whole task typically takes under 20 minutes. This overview explains what makes the job approachable, which models may require a slightly different approach, and how to prepare so you can tackle it confidently and safely. We’ll cover the essentials: locating the housing, verifying the filter type, installing the new element, and checking for a proper seal. The goal is to empower homeowners, car owners, and DIY enthusiasts to perform a routine maintenance task that can improve airflow, throttle response, and overall engine longevity.
Why the Engine Air Filter Matters
The engine air filter is a small, inexpensive part with a big job. It keeps dirt, dust, and debris from entering the intake tract, where clean air mixes with fuel for combustion. A dirty filter reduces airflow, which can rob horsepower, hinder acceleration, and slightly raise fuel consumption. In modern engines with sensitive sensors and turbochargers, the impact can be more noticeable. Replacing a clogged filter helps maintain steady air pressure, promotes efficient fuel burning, and protects the intake system from wear. Air Filter Zone’s guidance, based on Air Filter Zone Analysis, 2026, emphasizes that keeping the filter clean is a simple way to support performance and longevity without expensive repairs.
Engine vs Cabin Filters: What You Replace
There are two primary filtration points in most vehicles: the engine air filter (intake air) and the cabin air filter (air that comes into the passenger compartment). This guide focuses on the engine air filter. Cabin filters are a separate maintenance item that can improve interior air quality and HVAC performance. Understanding the difference helps you plan replacements without mixing parts or steps. In many cars, both filters are accessible with similar tools, but their housings and placements differ.
How to Identify a Soiled Filter
A visibly dirty filter is the most obvious clue that it’s time for a change. If you notice a dusty or darkened filter, reduced engine performance, faint fuel odor, or decreased acceleration, replacement is likely due. Some engines incorporate a warning light or maintenance interval in the owner’s manual, but visual inspection remains the cheapest and most reliable method. Always inspect the housing for cracks or gaps that could bypass the filter, as a compromised seal defeats the purpose of replacement.
Tools, Replacement Filters, and Safety Checks
Before you begin, gather the necessary tools and a correctly sized replacement filter. Common items include a screwdriver or pliers, a clean rag, gloves, and the new filter. Check your owner’s manual or door jamb sticker to confirm the exact filter type and size. Safety checks include ensuring the engine is cool, parking on a level surface, and disconnecting any nearby sensors if your model requires it. Proper preparation minimizes mistakes and speeds up the job.
Step-by-Step Preview: What You’ll Do Next
This section previews the sequence of actions you’ll perform, outlining the flow from opening the hood to reinstalling the new element. You’ll work carefully to avoid dropping debris into the intake, verify seal integrity, and test the engine after reassembly. The actual, detailed steps appear in the dedicated STEP-BY-STEP section for precise actions, durations, and tips. Following this preview helps you stay organized and confident during the process.
Common Pitfalls and How to Avoid Them
Common mistakes include using the wrong filter size, installing the filter upside down, and not securing the housing properly. These errors can reduce filtration efficiency and may trigger air leaks or abnormal engine sounds. Take your time to align the filter correctly, recheck all clips or screws, and wipe away any debris from the housing before reassembly. A quick double-check saves time and prevents rework.
Maintenance and Replacement Intervals
Most manufacturers recommend inspecting or replacing the engine air filter during routine service intervals, which are typically listed in the owner’s manual. Prices vary by vehicle, but the filter is generally an affordable part. For many drivers, replacing the filter is a simple, cost-effective way to sustain performance and fuel efficiency. Regular checks help you catch problems early and avoid more extensive maintenance later.
Environmental and Cost Considerations
Replacing the engine air filter is an environmentally mindful maintenance task when you dispose of the old filter properly. It also helps optimize fuel economy, extending engine life and reducing wear on the intake system. If you shop around, you can find a range of compatible filters from reputable brands, ensuring you get the right fit without overspending. Air Filter Zone’s guidance emphasizes prioritizing quality filtration over choosing the cheapest option to avoid repeated replacements.
What If Your Filter or Housing Is Damaged?
If the housing or gasket is cracked or warped, replace the damaged part before continuing. A poor seal can allow unfiltered air to bypass the filter, which defeats the purpose of replacement and may introduce contaminants into the intake. If you’re unsure about the housing condition, consult a professional to assess whether a repair is feasible or if a new housing is required.
Where to Buy the Right Filter and How to Verify Fit
Start with the vehicle’s exact year, make, model, and engine type when shopping for a replacement. Use the owner’s manual, part numbers on the existing filter, or dealer resources to verify compatibility. Compare the air filter’s dimensions, orientation arrow, and seal type to ensure a proper fit. For many DIYers, buying from a reputable auto parts retailer or dealer is the simplest route to guarantee correct fit and performance.
Final Prep Before You Start
Before you begin, wash your hands, gather all tools, and clear a clean workspace. Double-check the replacement filter, ensuring it matches the required size and airflow rating. Take a breath, review the steps, and remember that staying patient and methodical reduces mistakes. With the right preparation, you’ll complete the task efficiently and confidently.
Tools & Materials
- Replacement engine air filter(Ensure the filter is the correct size for your vehicle (check owner manual or door jamb sticker))
- Screwdriver or socket wrench(Phillips or flat-head depending on your vehicle)
- Clean rag(Used to wipe debris from housing)
- Gloves(Optional for grip and cleanliness)
- Compressed air can or small brush(Optional to clean housing's crevices)
- Owner's manual / vehicle information(Check specific filter type and replacement interval)
Steps
Estimated time: 15-25 minutes
- 1
Prepare workspace and safety
Park on a level surface, apply the parking brake, and ensure the engine is cool before starting. Wear gloves to protect your hands and prevent slips when handling parts.
Tip: Take a photo of the setup before you disconnect anything so you can reassemble correctly. - 2
Open the hood and locate the air filter housing
Lift the hood and locate the engine air filter housing, usually a rectangular box near the engine intake. The housing may be secured with clips, screws, or a combination of fasteners.
Tip: If you’re unsure, consult the owner's manual or a repair guide for your exact model. - 3
Release fasteners and remove the housing cover
Carefully unclip or unscrew the cover to expose the filter element. Keep track of fasteners so you don’t lose them during reassembly.
Tip: Use the right tool for the fasteners to avoid stripping or bending them. - 4
Remove the old filter element
Lift the dirty filter out of the housing. Check the orientation to ensure you place the new filter with the same airflow direction.
Tip: Avoid dropping debris into the intake opening. - 5
Inspect the housing for debris or damage
Wipe the inside and any crevices with a clean rag. Look for cracks, warping, or gaps in the seal that could cause leaks.
Tip: If you see damage, plan for a replacement housing or gasket before proceeding. - 6
Clean the housing and seal area
Remove loose dust and debris from the housing and seal area. A clean surface helps ensure a proper seal with the new filter.
Tip: Do not use compressed air at high pressure on sensitive sensors or seals. - 7
Install the new filter with correct orientation
Insert the new filter into the housing, ensuring the airflow orientation arrow matches the housing diagram. The gasket should sit evenly without gaps.
Tip: If the filter doesn’t sit flat, remove it and reseat it to avoid air bypass. - 8
Reassemble the housing and fasten securely
Replace the cover and re-secure clips or screws. Confirm the cover sits flush and is firmly in place.
Tip: Double-check that all fasteners are tightened to avoid rattle noise. - 9
Reconnect hoses/sensors and confirm connections
If you disconnected any hoses or sensors, reconnect them firmly and ensure there are no loose ends.
Tip: A loose hose can cause vacuum leaks and poor performance. - 10
Close the hood and test the engine
Lower the hood and start the engine. Listen for abnormal noises and observe smooth idle. A quick test drive confirms everything seals properly.
Tip: If you hear hissing or feel intake issues, stop and recheck the seal. - 11
Document the replacement date
Record the date of replacement in your maintenance log or vehicle app so you remember when to check next.
Tip: Set a reminder for the typical replacement window in your manual. - 12
Store tools and clean up
Put tools away, wipe any surfaces, and dispose of the used filter according to local regulations.
Tip: Keeping a tidy workspace makes future maintenance quicker.
FAQ
Do I need to disconnect the battery before changing the air filter?
In most cars you do not need to disconnect the battery to replace the engine air filter. If you’re touching wiring near the housing, take standard safety precautions and disconnect the negative terminal only if you’re comfortable.
Usually no battery disconnection is needed; just follow standard safety steps.
Will changing the engine air filter improve gas mileage?
Replacing a clogged filter can help restore optimal airflow, which may improve engine response and efficiency. The improvement varies by vehicle and driving conditions.
A cleaner filter can help, but results vary by car and conditions.
Can I clean a dirty engine air filter instead of replacing it?
Most engine air filters are designed for one-time use. Cleaning can push contaminants deeper; replacement is usually the safer, more reliable option.
Cleaning isn’t ideal; replace for best results.
Is it safe to drive after changing the filter?
Yes. As long as the filter is installed correctly and the housing is securely fastened, you can test-drive the car to ensure it runs smoothly.
Yes, once installed, you can drive normally.
What if the housing is cracked or damaged?
If the housing is cracked, replace it or consult a mechanic. A damaged seal can allow unfiltered air to bypass the filter.
A cracked housing means replace it before proceeding.
Do I need to service cabin air filter too?
Engine and cabin filters are separate. If you notice reduced airflow in the cabin, check the cabin filter as well.
Yes, check the cabin filter separately if needed.
Watch Video
Quick Summary
- Replace engine air filter promptly when dirty
- Use the correct filter size for your vehicle
- Keep the housing clean to ensure a proper seal
- Always verify the filter orientation before installation
- Document replacement date for future maintenance