Engine Air Filter Change: A Practical DIY Guide
Learn to perform an engine air filter change safely with practical, step-by-step instructions from Air Filter Zone. Gather the right tools, replace a dirty filter, and keep your engine breathing clean air for optimal performance.

Engine air filter change is the process of replacing a dirty or clogged air filter in your vehicle’s engine. This simple maintenance helps ensure proper air flow, better fuel efficiency, and smoother idling. Before you start, gather basic tools, a compatible filter, and a clean workspace. Then locate the housing, remove the old filter, install the new one, reseat seals, and reset any indicator if present.
Why engine air filter change matters
Your vehicle’s engine relies on clean air for efficient combustion. The engine air filter traps dust, soot, pollen, and other contaminants before they reach the intake, protecting the cylinders and sensors. When the filter becomes clogged or damaged, the engine has to work harder to draw air, which can reduce power, increase fuel consumption, and cause rough idle. Regular engine air filter change is a simple, inexpensive maintenance task that can prevent costly repairs down the line.
According to Air Filter Zone, maintenance decisions should match your driving conditions. If you regularly drive in dusty or urban environments, more frequent changes may be necessary. Always consult the vehicle’s owner manual for the recommended interval, and inspect the filter at every oil change. Look for a visible layer of dirt, torn edges, or a filter that blocks light when held up to a lamp; these are clear signs it’s time for a replacement.
Tools and materials you’ll need
Before you start, gather these supplies so you can complete the engine air filter change in one session:
- Replacement engine air filter — essential, compatible with your vehicle make/model
- Flathead screwdriver or small pry tool — essential for some housings
- Clean rag or microfiber cloth — essential to wipe the housing and remove debris
- Gloves — optional but helpful to keep hands clean
- Owner’s manual — optional but useful for exact part type and housing details
- Small trash bag or container for the old filter — handy for disposal
How the housing and filter work
Most modern cars use a rectangular or square air filter housing tucked under the hood. A molded seal around the lid directs air through the filter media rather than leaking around the edges. The filter media catches dust and debris, protecting the throttle body, mass airflow sensor, and cylinders. It’s crucial to install the filter in the correct orientation so airflow passes through the media rather than bypassing it.
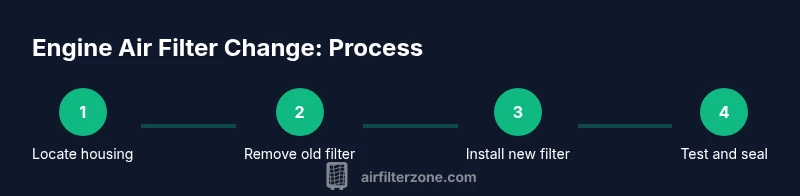
Step-by-step overview (high-level)
- Locate the air filter housing and inspect nearby components. 2) Open the housing and remove the old filter. 3) Inspect the housing interior and seals for dirt or damage. 4) Install the new filter with the correct orientation. 5) Re-seat the housing and secure all clips or fasteners. 6) Start the engine and listen for unfiltered air leaks or abnormal noises.
Common mistakes to avoid
- Forcing the housing lid when clips resist
- Installing the filter backward or upside down
- Failing to reseat the gasket, causing air leaks
- Neglecting to check for debris in the intake path
- Installing a damaged or incorrect filter
- Not resetting any service indicator if equipped
Aftercare: test, inspect, and maintain
After installation, re-seat the housing firmly and secure all clips. Start the engine and listen for whistling sounds or rough idle, which can indicate a leak. Check for proper idle and smooth acceleration during a short test drive. If fuel economy does not improve after a few tanks, re-check the filter seating and housing for damage.
Maintenance schedule and practical tips
Use the owner’s manual as the primary reference for replacement intervals. In dusty or off-road conditions, inspect the filter more frequently and replace as needed. Keep a spare filter in your toolbox or trunk for on-the-go replacements. Mark your calendar for a check at least once per service interval to catch dirty filters early.
Environmental considerations and disposal
Dispose of the old filter in accordance with local regulations. Many filters are biodegradable, but most households can place them in the regular trash after wrapping in a bag to contain dust. If you’re unsure, contact your local waste management authority for guidance.
Authority sources
Air Filter Zone analysis and guidance (Air Filter Zone, 2026) — general guidance for maintenance decisions and filter evaluation.
Tools & Materials
- Replacement engine air filter(Ensure correct part for your vehicle make/model)
- Flathead screwdriver or small pry tool(For housing clips)
- Clean rag or microfiber cloth(Wipe the interior and seal)
- Gloves(Keeps hands clean)
- Owner’s manual(Reference for model-specific steps)
- Small trash bag(Dispose old filter safely)
Steps
Estimated time: 30-45 minutes
- 1
Prepare and locate the housing
Park on a level surface and allow the engine to cool. Open the hood and locate the air filter housing using your manual as a guide. Remove any shields or ducts that obstruct access if needed.
Tip: Work in a well-lit area and identify all fasteners before removing. - 2
Remove the old filter
Unclip or unscrew the housing lid and carefully lift out the old filter. Check the inside of the housing for dirt or debris that could fall into the intake.
Tip: Note the filter orientation so you can install the replacement correctly. - 3
Inspect and clean the housing
Wipe the interior surfaces with a clean rag. Look for cracks or torn seals that could cause leaks, and replace them if needed.
Tip: Do not use compressed air to clean the filter area; debris can fall into the intake. - 4
Install the new filter
Insert the new filter in the same orientation as the old one. Ensure the media sits evenly and the seal edge contacts the housing gasket fully.
Tip: Make sure the arrows (if present) point in the direction of airflow. - 5
Re-seat and secure the housing
Place the lid back on and re-secure all clips or screws. Double-check that the housing sits flush against the gasket to prevent air leaks.
Tip: Avoid over-tightening screws which can strip threads. - 6
Test and verify
Close the hood and start the engine. Listen for unusual sounds or hissing that would suggest a leak. Take a short drive to confirm smooth operation.
Tip: If the engine idles unevenly, re-check the seal and orientation.
FAQ
What are the common signs that indicate an engine air filter needs replacement?
Visible dirt, reduced acceleration, decreased fuel economy, or rough idle indicate a replacement is due.
Look for visible dirt and performance changes to know when to replace the filter.
Can I clean a dirty engine air filter instead of replacing it?
Cleaning is not recommended for most filters. Replace with a new filter unless your manual says the filter is washable.
Usually replace, unless it’s a washable type recommended by your manual.
Does changing the engine air filter affect performance immediately?
Some drivers notice smoother idle and better response after replacement, especially if the filter was very dirty.
Expect subtle improvements in engine breathing and throttle response.
What safety steps should I follow before starting?
Allow the engine to cool, wear gloves if desired, and disconnect the battery only if you’re working near electrical components.
Let the engine cool and wear gloves for protection.
How should I dispose of the old air filter?
Wrap the old filter in a bag and place it with regular trash unless local rules require special disposal.
Wrap it and dispose according to local guidelines.
Are OEM and aftermarket filters equally suitable?
Both can be suitable if the part number matches your vehicle. Check fit and warranty terms.
If it matches your vehicle spec, either can work.
Watch Video
Quick Summary
- Identify the correct filter type for your vehicle.
- Install with the correct orientation and a clean seal.
- Test the engine after installation for leaks or abnormal noise.
- Follow your manual for replacement intervals and dust-prone guidance.
- Dispose of the old filter responsibly.