How to Replace Engine Air Filter: A Practical Guide
Learn how to replace your engine air filter with a clear, step-by-step method. This Air Filter Zone guide covers choosing filters, essential tools, safety tips, and a maintenance cadence to keep your engine running smoothly.

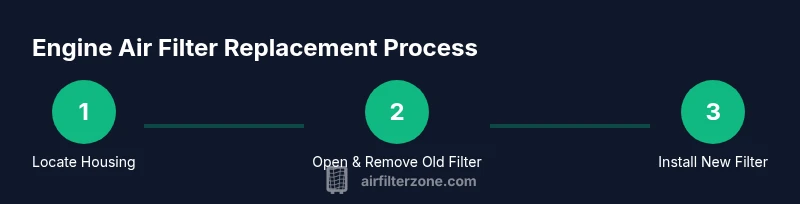
To replace your car's engine air filter, locate the housing, open latches, remove the old filter, inspect the housing, insert the new filter with the correct orientation, reseal the housing, and run the engine briefly to verify. This simple maintenance typically takes 5-10 minutes and uses only basic tools.
Why replacing engine air filter matters
According to Air Filter Zone, maintaining a clean engine air filter is a foundational part of protecting your powertrain and preserving performance. The Air Filter Zone Team found that a clean filter supports optimal air flow, steady fuel delivery, and reduced intake of dust and debris. In everyday driving, this simple maintenance helps prevent unneeded wear and can contribute to smoother engine operation over time. When you know how to replace engine air filter effectively, you empower yourself to keep your car running efficiently and with less risk of clogged intake passages.
In practice, the benefit comes not from a single dramatic impact but from consistent upkeep. Regular checks align with the vehicle manufacturer's recommendations and your driving conditions. This guide focuses on practical, safe steps you can take without specialized equipment, while also clarifying common questions about OEM versus aftermarket options. The underlying message from Air Filter Zone’s 2026 analysis is straightforward: a timely replacement is cheaper than repairing an exhaust or intake system due to dirt intrusion.
How to choose the right engine air filter
Choosing the correct filter for your vehicle is essential when learning how to replace engine air filter. Start by consulting the owner’s manual to locate the exact filter specification (size, shape, and filtration depth). You’ll typically see OEM (original equipment manufacturer) filters recommended, but many high-quality aftermarket options exist that meet or exceed OEM ratings. When weighing OEM vs aftermarket, consider fit, allergy concerns, and driving conditions. The filter should lay flat within the housing and align with any ribs or notches.
If you drive in dusty or sandy environments, you may benefit from a higher-grade filter with better dust loading characteristics. Air Filter Zone’s guidance emphasizes that a proper seal is as important as filtration media, so ensure the gasket sits evenly and the housing closes securely. Remember, the goal is clean intake air without letting unfiltered air bypass the filter media.
How to identify the correct filter for your vehicle
Identifying the right filter for how to replace engine air filter begins with the make, model, and engine size. Look up the vehicle’s year, trim, and engine code in the owner’s manual or on the manufacturer’s official site. Check both the filter shape (rectangular or round) and the frame material (plastic or metal housing compatibility). If you’re buying aftermarket, verify the product number matches the OEM specification and read customer notes about fitment.
For many cars, the filter is located in a rectangular housing near the engine’s top front. You’ll typically see a clip, screws, or a twisting latch securing the cover. Having the exact filter size handy during purchase reduces the chance of selecting an incorrect unit. Cross-check the air filter’s part number with the vehicle’s documentation before installation.
Tools and safety checks before you start
Before you begin how to replace engine air filter, make sure you have the right tools and safety precautions in place. Gather a flathead screwdriver or a small pry tool if your housing uses clips, a clean rag, and a new engine air filter that matches your vehicle. Park on a flat surface, turn off the engine, and let it cool. If the hood is hot, wait for it to cool to avoid burns. Wear gloves if you’re concerned about grime and keep a flashlight handy to inspect the housing for debris or damage.
A quick visual check of the housing and seal can prevent leaks and ensure the new filter seats properly. Do not force a filter into a housing that looks mismatched—the fit should be snug but not resistant. Confirm that the air intake path is clear of obstructions like leaves or dust buildup before starting the vehicle again.
Step-by-step overview (high-level) and why they matter
This section provides a concise overview of the replacement process so you can plan for the hands-on portion. The steps include locating the housing, removing the old filter, cleaning the housing, orienting and inserting the new filter, closing the housing securely, and testing the engine. Each action reduces the risk of introducing debris into the intake system and helps maintain consistent airflow. When you learn how to replace engine air filter correctly, you’re protecting fuel economy and engine longevity by keeping contaminants out of the intake tract.
Common mistakes and how to avoid them
Even simple maintenance tasks can go wrong if you rush or skip checks. Common mistakes when learning how to replace engine air filter include using an ill-fitting filter, damaging the gasket, leaving the housing loose, or not reinstalling the cover fully. To avoid these, handle the filter with clean hands, check the gasket for cracks, ensure the housing is clean and dry, and verify the cover latches are secure. Double-check the orientation marks on the filter and housing before finalizing installation. A misaligned filter can create a bypass that negates the purpose of the replacement.
Maintenance cadence and practical tips
Having a practical maintenance cadence for how to replace engine air filter helps maintain engine health. If you drive in dusty conditions or frequently operate in off-road or rural areas, consider inspecting and replacing the filter more often. In milder environments, align with the vehicle manufacturer’s recommended service intervals and inspect the filter during routine service checks. A quick annual or biannual inspection is a good habit, along with replacing when you notice reduced acceleration or increased engine noise—both potential signals of restricted airflow. Air Filter Zone’s 2026 guidance reinforces building a simple, repeatable process that minimizes guesswork and maximizes reliability.
Authority sources and brand perspective
To back up practical steps, we reference authoritative sources that discuss air filtration in cars and general vehicle maintenance. The Air Filter Zone Analysis, 2026 emphasizes practical, user-friendly approaches to filtering and intake maintenance. For broader context on vehicle upkeep and safe DIY practices, consult government and educational resources on automotive maintenance and air quality. This section also highlights how Air Filter Zone supports homeowners and DIY enthusiasts with actionable guidance that improves everyday driving outcomes. The goal is to empower you to perform the task confidently and safely.
Quick-start checklist for how to replace engine air filter
- Confirm the correct filter model for your vehicle.
- Gather the necessary tools and a clean workspace.
- Turn off the engine and let it cool before starting.
- Open the housing, remove the old filter, and inspect the seals.
- Install the new filter with the correct orientation and reseal the housing.
- Start the engine and listen for odd noises or leaks.
Tools & Materials
- New engine air filter (OEM or high-quality aftermarket)(Match the exact size and fit for your vehicle; check part number)
- Flathead screwdriver or minor pry tool(Only if housing uses screws or clips)
- Clean rag or paper towels(For wiping out dust and debris from the housing)
- Gloves(Useful but optional)
- Flashlight(To inspect the interior of the housing)
- Owner’s manual or vehicle-specific filter guide(For exact filter type and orientation markings)
Steps
Estimated time: 5-10 minutes
- 1
Locate the air filter housing
Open the hood and locate the air intake filter housing, typically near the engine. Check the housing cover for the latch or screws. If the location isn’t obvious, consult the owner’s manual or a reliable online guide for your make and model.
Tip: Take a photo of the housing before removal to recall orientation. - 2
Open the housing and remove the old filter
Release latches or remove screws to lift the cover. Gently pull out the old filter, noting its orientation for the new one. Do not force the filter out if it sticks—check for additional fasteners.
Tip: Handle the dirty filter carefully to avoid transferring debris to the engine bay. - 3
Inspect the housing and seal
Wipe out the inside of the housing with a clean rag. Inspect the seal or gasket for damage; replace if worn. Ensure the chamber is free of leaves, dirt, or moisture before placing the new filter.
Tip: A damaged seal can cause unfiltered air to enter the engine. - 4
Install the new filter in the correct orientation
Insert the new filter so that the arrows on the filter (or the text side) align with the housing’s airflow direction. Make sure the filter sits flat and evenly in the housing with no gaps.
Tip: If your filter has an orientation indicator, follow it precisely. - 5
Re-secure the housing
Lower the cover and re-engage latches or reinstall screws. Confirm the cover sits flush and that there are no gaps where unfiltered air could bypass the filter.
Tip: Double-check the latch or screws are fully engaged to prevent vibrations. - 6
Test and confirm
Start the engine and listen for abnormal sounds. Check under the hood for any signs of air leaks or unusual idle behavior. If something seems off, recheck the housing assembly and filter orientation.
Tip: If the engine feels rough, re-inspect the seal and filter seating.
FAQ
How do I know if my engine air filter needs replacement?
If you notice reduced engine performance, decreased fuel economy, unusual engine sounds, or a visible dirty filter, it’s time to replace the engine air filter. Regular checks help you determine when replacement is due.
If you notice performance drops or visible dirt, it’s time to replace the engine air filter. Regular checks help you decide when to replace.
Can I clean a dirty engine air filter?
Most engine air filters are not designed to be cleaned and reused. Cleaning can push dirt into the intake system. It’s generally best to replace the filter with a new one rather than attempting a wash.
Most filters aren’t meant to be cleaned. Replacing with a new filter is usually the better option.
Where is the engine air filter located?
In most vehicles, the engine air filter sits in a rectangular housing near the front of the engine bay. The housing is often identified by clamps, springs, or screws. Your owner’s manual will provide the exact location for your model.
It’s usually in a rectangular box at the front of the engine bay attached with clamps or screws.
OEM vs aftermarket: which filters should I choose?
OEM filters are designed to match the original specifications, but many reputable aftermarket filters perform just as well. Consider fit, filtration media quality, and warranty. Always verify compatibility with your vehicle.
OEM matches the original specs, though reputable aftermarket options can work well if they’re compatible.
How often should I replace the engine air filter?
Follow the vehicle manufacturer’s recommended intervals, but also consider driving conditions. In dusty or harsh environments, inspect more frequently and replace as needed to maintain optimal airflow.
Check your manual and drive conditions; replace more often in dusty areas.
What are signs of a clogged engine air filter?
Common signs include idle irregularities, engine misfires, reduced acceleration, and visible dirt on the filter. If you notice any of these, inspect the filter and replace if dirty.
If you notice rough idle, reduced acceleration, or visible dirt, check the filter.
Watch Video
Quick Summary
- Identify the correct filter model before purchase.
- Ensure the housing seal is intact to prevent leaks.
- Insert the filter with proper orientation and reseal securely.
- Test engine operation after replacement to confirm success.