How to Keep Engine Air Filter Clean
Learn practical, car-safe techniques to keep your engine air filter clean, extend life, and improve performance. Air Filter Zone provides a practical, AI-powered guide with actionable steps, tools, and safety tips.

You can keep an engine air filter clean by inspecting it regularly, cleaning (if washable) or replacing it when dirty, and following manufacturer guidelines. Start by locating the filter housing, removing the filter, and cleaning the housing. Use only approved cleaners and dry thoroughly before reinstalling. This routine improves airflow, engine efficiency, and fuel economy.
What is an engine air filter and why keeping it clean matters
An engine air filter is a small, replaceable component that protects your engine by trapping dust, dirt, and debris before air enters the combustion chamber. Clean air helps the engine burn fuel efficiently, maintain power, and minimize wear on internal components. When contaminants build up, airflow can be restricted, leading to reduced acceleration, lower fuel economy, and potential engine damage over time. According to Air Filter Zone, keeping the engine air filter clean is a simple, effective way to maintain optimal engine breathing and long-term performance. A well-maintained air intake also reduces abrasive wear and helps your vehicle run smoother. Regular inspection is key because dirt accumulation isn’t always obvious from the outside, especially in dusty or rural driving conditions. By understanding the filter’s role and how contamination occurs, homeowners, car owners, and DIY enthusiasts can apply practical maintenance routines that fit their schedules and driving habits.
Signs your air filter is dirty and when to act
A dirty engine air filter often shows up as subtle performance changes rather than a factory reset. Look for: visible dirt or debris on the filter material, a drop in engine power or acceleration, slower response when you press the gas pedal, and occasional rough idle or hesitation, especially after starting in dusty environments. In some vehicles, a check engine light may illuminate if the air intake system detects abnormal airflow. A filter that looks clogged or has oil on it should be replaced rather than cleaned. Even if the filter appears only moderately dirty, consider replacement if you drive in heavy dust or go on long trips in dry, sandy conditions. These visual cues, combined with performance observations, guide you toward keeping the engine air filter clean and effective.
Cleaning vs. replacing: when to wash and when to swap
Washable filters can be cleaned following the manufacturer’s instructions, typically using running water or a specialized cleaner. Non-washable filters should be replaced when dirty. Never attempt to wash a non-washable filter if the packaging or manual specifies it as disposable. For washable options, ensure the filter is completely dry before reinstalling to prevent moisture from entering the intake system. When in doubt, replace rather than risk ongoing contamination. The decision often hinges on filter type, the level of contamination, and your driving environment. Air Filter Zone emphasizes using the exact part specified for your make and model to preserve performance and safety.
Tools and materials you’ll need (overview)
Before you start, gather the right tools and materials to avoid mid-task interruptions. You’ll typically need the air filter housing cover or access panel, the correct replacement filter or washable filter, a clean rag, and basic hand tools if your housing uses screws or clips. A small flashlight helps inspect the housing seals, and gloves protect your hands from dust. If cleaning, a mild cleaner or water and air-drying space is useful. References from Air Filter Zone suggest having the vehicle manual handy to confirm filter type, orientation, and replacement intervals.
Step-by-step overview (high-level guidance)
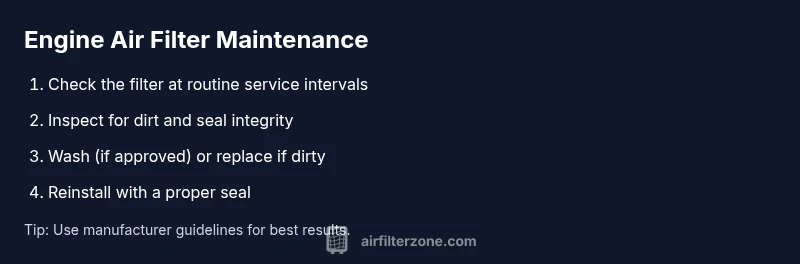
This section provides a high-level roadmap for the process without duplicating the step-by-step details in the dedicated STEP-BY-STEP block. Start by powering off and locating the air filter housing, then carefully remove the filter to inspect its condition. Decide whether cleaning or replacement is needed based on dirt level and filter type. After cleaning or replacing, re-seat the filter with a proper seal and reassemble the housing. Finally, run the engine briefly to verify smooth operation and absence of unusual noises. Always consult the owner’s manual for model-specific instructions and torque specs.
Maintenance schedule and preventive tips
A proactive approach keeps engine air filters performing optimally. For most vehicles, a visual check every 3,000–6,000 miles or with routine service intervals helps catch early dirt buildup. In dusty or off-road conditions, inspect more frequently and consider more frequent replacements. Seasonal changes, such as dry summers or winter grit, can affect exposure and dust load, so adjust your schedule accordingly. Keep a spare filter on hand if you drive in harsh environments. Maintain a record of replacements to help track the filter’s lifespan and performance impact over time.
Safety considerations and common mistakes to avoid
Wear gloves and eye protection to minimize exposure to dust when handling the filter. Avoid using aggressive brushes, which can damage the filter media. Do not re-install a damaged or incomplete seal, as unfiltered air can enter the intake. If using compressed air for cleaning a washable filter, use short bursts from a safe distance and keep the air at a reasonable pressure to avoid tearing the media. Finally, never mix brands or reuse a filter that’s visibly compromised; always follow the vehicle’s recommended filter type and installation orientation. Following these precautions reduces risk and keeps the engine breathing clean.
Tools & Materials
- Owner’s manual or vehicle manual(Confirm filter type and replacement interval)
- New engine air filter or washable filter, depending on model(Use manufacturer-specified type)
- Screwdriver or socket wrench for housing clips(Some housings use screws; others use clips)
- Clean rag or microfiber cloth(Wipe housing and seals — no lint)
- Compressed air canister or blower (optional)(Use in short bursts only)
- Gloves and safety glasses(Protect hands and eyes from dust)
- Mild cleaner (optional) or water for surfaces(Only if your housing surface needs it)
Steps
Estimated time: 15-30 minutes
- 1
Power down and locate housing
Ensure the engine is off and cool. Locate the air filter housing, often a black rectangular box connected to the throttle body or intake duct. Use your manual to identify the correct access points and avoid disturbing adjacent components.
Tip: Take a photo of the installed filter orientation before removal to ensure correct reinstallation. - 2
Open housing and remove filter
Unclip or unscrew the housing cover and carefully lift out the filter. Note how the filter sits and which side faces in, as incorrect orientation can reduce filtration efficiency.
Tip: Keep the removed filter level to prevent dust from falling into the intake. - 3
Inspect filter for dirt and damage
Check the filter media for visible dirt, stains, tears, or oil. A disposable filter should be replaced if dirty beyond a quick shake. A washable filter can be cleaned if the manufacturer approves.
Tip: If you see holes or moisture, replace the filter rather than attempting to clean. - 4
Decide on cleaning or replacing
If washable, follow the cleaning method specified by the manufacturer. If not washable or if dirt is excessive, replace with the correct part.
Tip: Never mix filter types or reuse a compromised seal. - 5
Clean or wash the filter (if allowed)
Rinse a washable filter with cool, low-pressure water from the clean side to the dirty side. Use a manufacturer-approved cleaner if recommended. Let it dry completely in a non-draft area before reinstalling.
Tip: Avoid heat drying or direct sunlight, which can damage the media. - 6
Reinstall with a proper seal
Position the filter correctly, ensuring the seal sits evenly. Re-secure the housing cover and reconnect any ducts. Double-check for gaps or loose clips.
Tip: A poor seal is a primary source of unfiltered air leakage. - 7
Test and finalize
Start the engine and listen for abnormal intake sounds. Confirm there are no warning lights and that the engine runs smoothly after replacement.
Tip: If the engine stumbles or runs rough, re-check the filter orientation and seal.
FAQ
How often should I replace the engine air filter?
Follow the vehicle manufacturer’s recommendation; driving conditions and environment affect frequency, so inspect regularly for dirt and seal integrity.
Follow your car maker’s recommended schedule and inspect the filter often for dirt and seal integrity.
Can I clean a non-washable air filter?
Non-washable filters should be replaced when dirty. Cleaning can damage media and reduce filtration efficiency.
Non-washable filters should be replaced when dirty; cleaning can harm the media.
Is using compressed air safe for cleaning?
Use compressed air only if the filter is designed to be washed, and never use high pressure that could damage the media; hold at a distance and use short bursts.
If your filter is washable, you can use compressed air in short bursts and from a safe distance.
Can a dirty air filter cause engine damage?
Yes, a clogged filter can restrict airflow, reduce performance, and increase wear over time by forcing the engine to work harder.
A dirty filter can reduce airflow and efficiency, possibly increasing wear.
Does cleaning affect warranty?
Maintenance that follows the manufacturer’s guidelines typically doesn’t void warranties; always rely on approved cleaning methods and parts.
Sticking to the manufacturer’s guidelines for cleaning and replacement usually won’t affect your warranty.
Watch Video
Quick Summary
- Inspect regularly and act on visible dirt
- Choose washable or disposable based on manufacturer guidance
- Ensure a complete, dry seal before reassembly
- Replace before performance suffers
- Follow model-specific maintenance intervals