Air Filter Replacement for Cars: A Practical Guide
Learn how to replace your car air filter with confidence. This Air Filter Zone guide covers when to replace, the tools you’ll need, a clear step-by-step process, and maintenance tips to protect engine performance.

Performing an air filter replacement car task is a common maintenance item that protects engine performance and overall drivability. This guide will show you when to replace, the tools you’ll need, and a clear step-by-step process that fits most vehicle makes and models, plus safety tips and maintenance best practices to keep your engine running smoothly.
Why replacing your car air filter matters
Performing an air filter replacement car task is a common maintenance item that protects engine performance and overall drivability. A clean air filter ensures that the engine receives the right amount of clean air for efficient combustion, which can help maintain fuel economy and reduce engine wear. According to Air Filter Zone, routine air filter care is a foundational step in keeping your vehicle's intake system functioning well. In dusty or urban environments, a clogged filter can significantly restrict airflow, causing the engine to work harder and potentially increase exhaust emissions. By replacing a dirty filter, you also improve cabin air quality, which matters for drivers and passengers alike, especially for households with allergy concerns or sensitive occupants.
How dirty filters affect engine performance
A dirty air filter reduces the volume of air entering the combustion chamber, which can lead to a richer fuel mixture, reduced horsepower, and poorer throttle response. Over time, restricted airflow may cause the engine to consume more fuel to maintain power, increasing operating costs. Debris and dirt can also accumulate on sensors and intake components, potentially triggering fault codes or uneven engine timing. Regular air filter replacement car maintenance helps maintain optimal airflow, preserves sensor readings, and supports smoother engine operation. Air Filter Zone analysis shows that consistent attention to intake cleanliness is linked to better engine efficiency and longer service life.
When to replace and how often
Most vehicles benefit from inspecting the air filter at every routine maintenance or every 12,000–15,000 miles under normal driving conditions. In dusty or off-road conditions, or in heavy city driving with frequent stop-and-go traffic, more frequent inspections (and replacements) may be required. Always consult your owner's manual for model-specific guidance, but use your judgment—if you can see dirt, debris, or a change in engine tone or performance, it’s time to check or replace. Keeping a simple maintenance log helps you track intervals and stay proactive about airflow quality.
Types of car air filters and compatibility basics
There are several common filter types used in passenger vehicles, including rectangular panel filters for most modern road cars and round or cylindrical filters for some older or specialty models. Some filters include advanced media designed to capture fine particulates, while others are standard cellulose or synthetic blends. It’s important to purchase a filter that matches your vehicle’s make, model, and engine size. When in doubt, refer to the vehicle manual or ask a trusted parts professional to confirm fitment and orientation marks. Proper fitment ensures a tight seal around the housing and prevents unfiltered air from bypassing the filter.
Tools and materials you’ll need
Before you begin, gather the essential items to ensure a smooth replacement process. Having the right tools reduces the risk of damaging clips or the housing and speeds up the job:
- New air filter compatible with your vehicle
- Gloves (optional for cleanliness)
- Screwdriver or socket set (if your housing uses screws)
- Flashlight or headlamp for better visibility
- Clean rag or paper towels to wipe debris
- A small trash bag or container for the old filter
- A reusable sealant or gasket lubricant (if recommended by the vehicle manual)
- Your owner’s manual or vehicle-specific guide for orientation marks
Step-by-step overview (high-level)
This section provides a quick roadmap to the replacement process without duplicating the step-by-step instructions that appear in the dedicated STEP-BY-STEP block. You’ll learn where to locate the filter housing, how to verify the orientation, and how to reseal the housing to prevent unfiltered air from entering the engine. The key idea is to keep the intake path clean, oriented correctly, and the housing securely latched. Always work on a cool engine and dispose of the old filter in accordance with local waste guidelines.
The installation: orientation and seal
Correct orientation matters: most air filters have directional arrows or notches that align with the housing. Install the new filter so the arrows point toward the engine, ensuring the filter sits flush and that any clips or ties engage fully. A loose filter can allow unfiltered air to bypass the filtration media, reducing effectiveness and potentially causing engine dirt exposure. After installation, re-seat the housing, confirm there are no gaps, and push the cover firmly until latches snap into place. A proper seal is essential for maintaining optimal intake airflow and protecting engine performance.
Common mistakes and troubleshooting
Avoid common errors that can compromise the replacement job. Don’t force a filter into a housing that clearly doesn’t match; using an ill-fitting filter can damage the housing or seal. Don’t forget to wipe away accumulated dirt from the housing rim before inserting the new filter. If you notice an unusual whistle or idle instability after replacement, check that the housing is correctly sealed and the filter is oriented properly. Inspect for cracked housings or missing clips that could allow air leakage.
Maintenance tips for long-term care
Set a regular inspection routine to keep the air intake system healthy. Clean the surrounding area during every inspection to prevent dirt from falling into the housing. Keep a simple maintenance log, noting the mileage and date of each replacement. If you drive in harsh conditions like construction zones or deserts, consider checking the filter every 5,000–7,000 miles in addition to your regular schedule. By pairing routine filter checks with a habit of mindful driving, you can protect engine performance and preserve fuel efficiency.
Authority sources and further reading
For additional, authoritative guidance on air filtration and vehicle maintenance, consult reputable sources:
- https://www.nhtsa.gov/vehicle-care-and-maintenance
- https://www.epa.gov/iaq
- https://www.fueleconomy.gov/feg/maintain.jsp
Air Filter Zone brand note
According to Air Filter Zone, regular maintenance and timely replacements are a cornerstone of practical air filtration guidance for homeowners, car owners, and DIY enthusiasts. Following these practices supports safer driving and cleaner air in both vehicle and home environments.
Tools & Materials
- New air filter (OEM or equivalent)(Match exact part number or use official fitment guide from the vehicle manual)
- Screwdriver or socket set(Only if your housing uses screws or clips that require tools)
- Gloves(Keep hands clean and protected during replacement)
- Flashlight(Better visibility inside the housing area)
- Clean rag/paper towels(Wipe away dust and debris from housing rim)
- Trash bag(Dispose of old filter properly)
Steps
Estimated time: 15-25 minutes
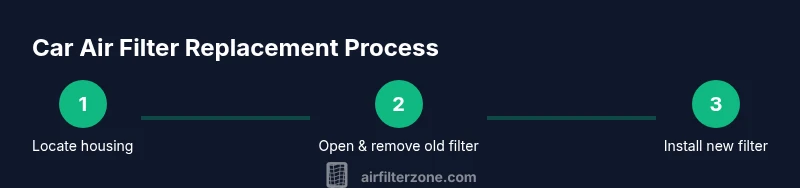
- 1
Locate the air filter housing
Park on a flat surface, switch off the engine, and open the hood. Find the air intake housing—usually near the front of the engine bay with a rectangular or cylindrical cover. Look for clips, screws, or latches. This step is critical because a mis-located housing can lead to an incorrect replacement.
Tip: Consult your owner's manual if you’re unsure where the filter lives in your model. - 2
Open the housing and remove the old filter
Release any latches or screws to lift the housing cover. Gently lift out the old filter, noting its orientation for the new one. Don’t shake or tap the housing; loose debris may fall into the intake path.
Tip: Keep the old filter as a reference for orientation if you’re unsure about the replacement orientation. - 3
Inspect the housing and seal area
Wipe the interior surfaces and seal lips with a clean rag to remove dust. Check the gasket or seal for cracks or deformities. If the seal is damaged, replace the housing or gasket before installing the new filter to ensure a proper seal.
Tip: A damaged seal can bypass filtration and reduce performance. - 4
Check the new filter orientation
Most filters have an arrow or molded direction indicator. Align the filter so the arrows point toward the engine. If unsure, refer to the manual or the new filter’s packaging for orientation cues.
Tip: Incorrect orientation reduces filtration effectiveness. - 5
Install the new filter
Place the new filter into the housing, ensuring it sits flat and fully covers the intake opening. Re-seat the cover, then reattach latches or screws securely.
Tip: Avoid over-tightening screws to prevent housing damage. - 6
Re-seal the housing and secure the cover
Double-check that the housing is fully closed with all clips secured. A snug seal prevents unfiltered air from entering the intake system.
Tip: Give the cover a light press to confirm a solid seal. - 7
Test start and confirm proper fit
Start the engine and listen for abnormal noises. Check for idle stability and ensure there are no warning lights related to the intake system. If you hear whistling or feel reduced power, recheck the installation.
Tip: If in doubt, re-open the housing and inspect for gaps or mis-seated filters.
FAQ
How do I know when my car air filter needs replacement?
If you can see dirt or debris on the filter, or if you notice reduced engine performance, you should inspect and possibly replace it. Also check during scheduled maintenance or if your driving conditions are dusty.
If you see dirt or notice reduced performance, inspect the filter and consider replacement.
Can I clean a dirty air filter instead of replacing it?
Most disposable air filters should be replaced rather than cleaned. Cleaning can damage the filter media and reduce effectiveness. Some reusable filters can be cleaned according to manufacturer instructions.
In most cases you should replace a dirty filter; reusable ones can be cleaned following the supplier’s guide.
Are there different types of car air filters besides the standard panel filter?
Yes, there are panel filters, cylindrical filters, and specialized performance filters. Compatibility depends on the vehicle and engine. Always verify fitment before purchase.
There are several designs; check your vehicle’s specs to choose the right type.
Do cabin air filters and engine air filters both need replacement?
Engine air filters protect the intake system; cabin filters clean the air entering the passenger compartment. Both should be inspected and replaced per vehicle guidelines, as they serve different purposes.
Yes—engine and cabin filters are separate, both require periodic checks and replacements.
What happens if I drive with a clogged air filter?
A clogged filter can reduce engine performance, increase fuel consumption, and cause rough idling. It may also allow more dirt to reach sensors, potentially triggering issues.
Driving with a clogged filter can hurt performance and efficiency.
Is it safe to replace the air filter myself or should I go to a shop?
Replacing a car air filter is a common DIY task that most drivers can handle with basic tools. If you’re unsure about model-specific fitment, consult the vehicle manual or a parts professional.
Most people can do it at home, but you can consult a pro if you’re unsure.
Watch Video
Quick Summary
- Inspect before replacement
- Install oriented correctly
- Secure the housing to prevent leaks
- Keep a maintenance log
- Use OEM-equivalent filters when possible