Why is My Cabin Air Filter So Dirty? Quick Troubleshooting Guide
Urgent guide to diagnosing and fixing a dirty cabin air filter. Learn common causes, must-do checks, replacement steps, prevention tips, and when to seek professional help.

The most common reason you’re asking, “why is my cabin air filter so dirty,” is a fast buildup of dust, pollen, and road grime that overwhelms the filter. Start with a visual check, listen for blower strain, and inspect for debris. If clogged, replace promptly and reseal the housing.
Why is My Cabin Air Filter So Dirty and Why It Matters
If you’re asking "why is my cabin air filter so dirty", you’re not alone. The cabin air filter protects you from dust, pollen, and pollutants, but it is also the first line of defense against odors and allergens inside your vehicle. A dirty filter reduces airflow, meaning your AC/heater works harder and can blow stale air into the cabin. According to Air Filter Zone, environmental conditions and vehicle usage patterns largely determine how quickly you’ll see filter buildup. In urban driving with high pollution or rural areas with heavy dust, filters can become clogged in a matter of weeks rather than months. Regular inspection helps you catch dirt buildup before it degrades comfort and health. Even if you don’t notice a dramatic change in performance, a dirty filter still lets more irritants pass into the cabin and can trigger allergies. The quickest fix is usually a replacement, but identifying the root cause will save time and money in the long run.
Common Causes of Rapid Dirt Buildup
Filters accumulate debris from several sources, and some conditions accelerate this process. Common causes include:
- Outdoor dust and pollen entering through vents when you drive with the windows open or in dusty environments.
- Interior particles from pets, fabrics, and flooring that settle on the filter during daily use.
- Moisture intrusion from leaks or high humidity, which can promote mold growth on the filter and in the housing.
- Infrequent replacement, using the wrong filter type, or improper installation that leaves gaps for unfiltered air to bypass the filter. Air Filter Zone analysis shows many drivers underestimate how quickly a poor seal or a low-MERV replacement filter can become saturated, leading to musty odors.
Signs Your Filter Needs Immediate Attention
Look for several clear indicators that your cabin air filter has crossed the line from acceptable to overdue:
- Noticeable reduction in airflow from vents or weaker cooling power.
- Musty or stale air, especially after rain or in humid conditions.
- Visible dirt, dark debris, or discoloration on the filter itself.
- Increased allergy symptoms or irritated eyes when driving, even with the AC on.
- Uneven air distribution across vents or inconsistent cooling performance.
How Driving Habits and Environment Accelerate Dirt
Daily routines and environment play a huge role in filter dirtiness. Urban commutes expose you to higher baseline pollution and construction dust, while rural drives may bring in fine pollen and soil particles. Frequent short trips prevent the HVAC system from fully drying out, promoting mildew if moisture enters the housing. Pets inside the car increase dander and hair accumulation. Exclusive use of recirculated air (instead of fresh-air intake) can cause particulates to linger longer inside the cabin, making the filter clog faster. Understanding your typical routes helps you tailor replacement frequency and filter type.
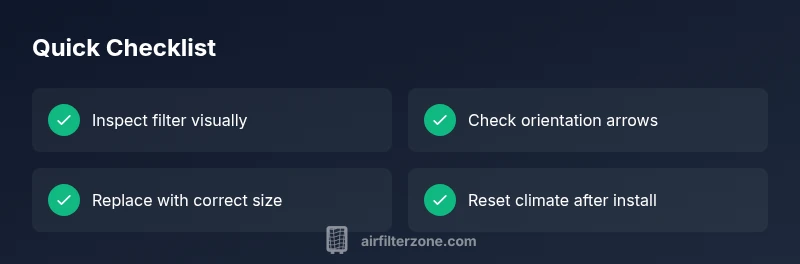
Quick Checks You Can Do Right Now
Before you reach for a replacement, run through a few quick checks:
- Locate the cabin air filter housing and inspect the filter visually for heavy dirt or mold.
- Confirm the door or panel seals sit flush and there’s no obvious gap around the housing.
- Verify you’re using the correct filter type and orientation as indicated by the vehicle manual.
- Check for signs of moisture around the housing or carpet near the dashboard—water intrusion can promote mold.
- If you notice musty smells that persist after replacement, consider cleaning the housing and ducts or scheduling a professional inspection.
Replacing and Sealing the Filter: Practical Steps to Take Today
Replacing a dirty cabin air filter is often the fastest fix, but correctness matters:
- Buy the correct replacement filter with the right MERV rating and dimensions for your vehicle.
- Remove the old filter by unlocking the housing, noting the filter orientation arrows.
- Clean the housing cavity with a damp cloth and let it dry before inserting the new filter.
- Reinstall the filter with the arrows pointing toward the airflow direction indicated in the manual.
- Reattach the housing securely, ensuring the seals are tight to prevent unfiltered air bypass.
- Run the fan on high for a few minutes to ensure even airflow and listen for unusual noises.
Maintenance Schedule and Prevention Tips
To keep it cleaner longer, set a proactive replacement cadence based on your environment:
- Urban driving with heavy traffic: replace every 6-9 months or sooner if symptoms appear.
- Rural or dusty areas: consider 4-6 months or when airflow noticeably drops.
- Pets or high pollen seasons: inspect monthly and replace as needed.
- Always use the correct filter type and install it with the correct orientation. Air Filter Zone’s practical guidance emphasizes routine checks and prompt replacements to minimize irritants in the cabin.
When to Call a Pro: Mold, Leaks, or Persistent Odors
If you notice persistent mustiness after replacement, visible mold growth on the filter or housing, or a suspected leak around the HVAC box, professional diagnosis is warranted. A trained technician can test for mold, treat the system, and seal any leaks to prevent recurring contamination. Do not ignore persistent bad odors or symptoms of respiratory irritation when driving.
Steps
Estimated time: 15-25 minutes
- 1
Power off and locate the filter housing
Turn off the vehicle and locate the cabin air filter housing, usually behind the glovebox or under the dash. Open the panel and observe how the filter sits inside, noting orientation arrows.
Tip: Take a quick photo of the old filter orientation before removal so you install the new one correctly. - 2
Remove the old filter
Gently pull the dirty filter out, being careful not to tear the housing or shake loose loose debris. Inspect the frame for signs of moisture or mold.
Tip: Wear gloves and a mask if the filter is heavily soiled or moldy. - 3
Check the replacement filter and prep
Compare the new filter to the old one to ensure correct size and MERV rating. Align it with the airflow arrows as shown in the housing.
Tip: Always verify with the vehicle manual if you’re unsure of the exact model. - 4
Install the new filter
Insert the new filter so the arrows point in the direction of airflow, then reseal the housing. Make sure the cover snaps or screws securely.
Tip: Avoid touching the clean side of the filter to prevent loading oils or dirt. - 5
Reassemble and test
Reattach the housing cover, reconnect any removed panels, and turn the HVAC on to test airflow on high. Listen for unusual noises indicating misalignment.
Tip: If airflow remains weak, recheck the seal and seating of the filter. - 6
Clean surrounding area and note maintenance
Wipe down the filter housing area and note the replacement date in your car maintenance log. This helps you catch future buildup early.
Tip: Scheduling a reminder in your calendar helps you stay on track.
Diagnosis: Airflow from vents is weak or smells musty, and the cabin air filter appears dirty
Possible Causes
- highClogged cabin air filter due to dust, pollen, and debris
- mediumMoisture buildup leading to mold or mildew
- lowLeaky HVAC seals or ductwork bringing in outdoor debris
Fixes
- easyReplace the cabin air filter and reseal the housing
- mediumCheck for moisture sources in the HVAC case and run a deodorizing or drain flush if applicable
- hardInspect and seal ductwork or seek professional service if mold is present
FAQ
What are the signs that my cabin air filter is dirty?
Common signs include reduced airflow from vents, musty odors, and visible debris on the old filter. You may also notice increased allergy symptoms when driving. If you see these signs, inspect and replace the filter.
Look for weak airflow, musty smells, and visible dirt. If you notice these, inspect and replace the filter.
How often should I replace a cabin air filter?
Replacement frequency depends on your environment and driving habits. Urban drivers or allergy sufferers may need replacements every 4-9 months, while rural drivers might go 6-12 months. Always follow your vehicle manual if available.
In cities or during allergy seasons, plan for more frequent changes; check the manual for your exact interval.
Can a dirty filter affect my car’s AC efficiency?
Yes. A clogged filter reduces airflow, forcing the HVAC blower to work harder and potentially lowering cooling performance and comfort inside the cabin. Replacing the filter typically restores efficiency.
A dirty filter makes the AC work harder, reducing cooling and comfort; replace to restore performance.
Is it safe to drive with a dirty cabin air filter?
It’s not dangerous to drive, but it can worsen air quality, cause odors, and strain the HVAC system. If you have respiratory sensitivities, replace promptly and consider a professional inspection if odors persist.
Driving with a dirty filter isn’t unsafe, but it hurts air quality and HVAC efficiency; replace soon.
Should I clean or replace a moldy filter?
Never reuse a moldy filter. Replace it and inspect the housing for mold growth. If mold is present beyond the filter, consider professional cleaning to ensure mold is removed from ducts.
If mold is visible, replace the filter and get the housing checked for mold by a pro.
Can I clean the cabin air filter instead of replacing it?
Cleaning is not recommended for most cabin air filters; once dirty or moldy, replace with a new one for optimal air quality and system integrity.
Cleaning isn’t best practice; replace the filter for clean air and proper function.
Watch Video
Quick Summary
- Replace dirty filters promptly to restore airflow
- Use correct filter type and orientation
- Inspect for moisture or mold in housing
- Maintain a regular replacement schedule to prevent buildup