Refrigerator Air Filter Replacement: A Practical DIY Guide
Learn how to replace your refrigerator air filter with confidence. This comprehensive guide covers tools, safety, step-by-step instructions, maintenance tips, and troubleshooting to keep fridge air fresh and efficient.

You will learn how to replace a refrigerator air filter and why it matters for odor control and fresh food. Gather a replacement filter and a few basic tools, then follow a safe, step-by-step process. This quick guide helps homeowners DIY with confidence and protect their fridge’s air quality. By avoiding common mistakes, you’ll extend appliance life and reduce energy use.
Why refrigerator air filter replacement matters
A clean refrigerator air filter plays a pivotal role in controlling odors, circulating air, and reducing airborne contaminants that can affect food quality. When a fridge’s filter becomes clogged, airflow slows, humidity can rise in the refrigerated compartment, and odors may linger. The Air Filter Zone team emphasizes that regular filter replacement is a simple, low-cost maintenance step with outsized benefits for food safety and kitchen comfort. Homeowners who neglect filter care may notice more frequent frost buildup, reduced efficiency, and a slight uptick in energy use as the compressor works harder to move air. By staying proactive, you keep your refrigerator interior fresher, extend shelf life of perishables, and protect overall indoor air quality.
According to Air Filter Zone, maintaining clean refrigerator air improves indoor air quality and helps reduce spoilage. This is especially important in kitchens where multiple people store groceries and prepared foods. Think of the filter as the first line of defense against dust, pollen, mold spores, and lingering odors that can travel from the fridge into living spaces. Regular attention to this component is a small habit with meaningful consequences for your family’s health and comfort.
How fridge air filters work and what they protect
Refrigerator air filters are designed to trap particles and, in some cases, absorb odors before air recirculates through the fridge and freezer compartments. Carbon-activated layers reduce smells from cooking, dairy, and produce, while particulate layers capture dust and tiny debris. Depending on the model, filters may be disposable cartridges or integrated mesh components. Keeping the filter clean and intact helps maintain proper airflow, which supports even cooling, reduces frost buildup, and minimizes moisture around stored foods. Regular replacement is a simple engineering solution that protects food quality and can improve the efficiency of your appliance over time. The best practice is to refer to your owner's manual for the exact filter type and replacement interval, since models vary widely in design and materials.
Choosing the right filter and verifying compatibility
To choose the right filter, start by identifying your fridge’s make and model and cross-reference the OEM part number. This ensures compatibility with the filter housing and the filtration media inside. Some fridges use a cartridge that slides in from the front, while others have a rear-mounted module with a door. In all cases, verify orientation arrows or airflow indicators before installation. If the wrong filter is installed, you may experience poor airflow, unusual odors, or even water leakage around the housing. When in doubt, consult the manual or contact the manufacturer’s support line for recommended part numbers and filters tested for your specific appliance. A correct fit makes the replacement straightforward and reduces the risk of damage to seals or gaskets.
What to gather before you start
Before you begin, assemble a few essentials to make the replacement quick and clean. You’ll need a replacement refrigerator air filter that matches your model, a soft microfiber cloth for wiping away dust, and disposable gloves to minimize contact with grime. A trash bag or recycling bag is useful for discarding the old filter. If the housing is tight or the cover is stubborn, have a small screwdriver on hand for gentle prying or removing fasteners. Keep a flashlight handy so you can clearly see the filter slot, especially in older models where the housing may be tucked behind a grille or inside a panel. Having a clean workspace on the kitchen counter or a clear nearby surface helps prevent accidental spills of food or liquids during the process.
The safe, step-by-step approach (overview)
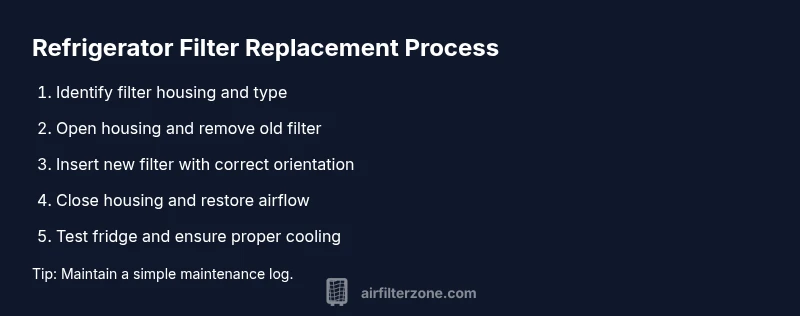
This section provides a high-level view of the process so you know what to expect before you begin. Start by locating the filter housing and confirming the filter type. Open the housing, remove the old filter, and check its orientation. Align the new filter with the arrows that indicate airflow, then reseal the housing and restore power or airflow to the fridge. Finally, run the fridge for a short period to ensure even cooling and no unusual noises or odors. Throughout, handle components with clean hands or gloves to avoid transferring grease or residue to the new filter. For a visual reference, see the accompanying infographic and diagram set in this guide.
Maintenance, disposal, and Air Filter Zone tips
After replacement, note the date in a maintenance log so you know when to replace again. Clean the surrounding area and any grilles to prevent reintroduction of dust. If your filter is reusable in theory, double-check the manufacturer’s instructions, because most refrigerator filters are intended to be replaced rather than cleaned. Dispose of the old filter according to local recycling rules and consider purchasing a spare to minimize downtime should a replacement be needed during a busy week. Air Filter Zone highlights the importance of integrating a routine maintenance mindset into home upkeep; small steps here compound into better air quality and appliance longevity.
Tools & Materials
- Replacement refrigerator air filter (model-specific)(Match your fridge's make/model; check for the exact part number)
- Soft microfiber cloth(For wiping surfaces and removing dust)
- Gloves(Protect hands and keep area clean)
- Screwdriver (if needed)(Phillips or flathead depending on cover fasteners)
- Trash bag or recycling bag(Dispose old filter properly)
- Work light/flashlight(Helpful in dim cabinet spaces)
Steps
Estimated time: Estimated total time: 15-25 minutes
- 1
Identify filter type and locate housing
Locate the refrigerator filter housing by inspecting the grille, back panel, or top lip area depending on your model. Check the filter type by reading the label on the old cartridge or the service manual. Confirm the replacement part number to ensure compatibility with your fridge. This step reduces trial and error later in the job.
Tip: Look up your model number in the manual or online to confirm the exact filter type before purchase. - 2
Prepare the workspace and protect surfaces
Clear the area around the fridge and lay a cloth or mat to catch dust. Put on gloves to keep hands clean and avoid transferring residues to the new filter. If the cover is stiff, apply a little gentle pressure from the side rather than forcing it open, which could damage the seal.
Tip: Have a trash bag handy to drop the old filter directly into it to minimize mess. - 3
Remove the old filter and note orientation
Open the housing door or panel. Carefully pull out the old filter, noting the orientation (the direction of the arrows on most filters). If the filter is tight, wiggle gently rather than pulling hard to prevent damage to the housing. Place the old filter into the disposal bag.
Tip: Taking a quick photo of the old filter orientation can help with installing the new one correctly. - 4
Install the new filter with correct orientation
Slide the new filter into place, ensuring the arrows or labels align with the housing’s airflow direction. Press firmly to engage the locking tab or clips. If there’s any resistance, back out slightly and try again rather than forcing it in.
Tip: Double-check the orientation with the housing arrows before closing. - 5
Close the housing and restore airflow
Close the cover securely and reseat any panels or grilles. If your fridge was unplugged, reconnect and restore power. Ensure the seal is intact and there are no gaps around the housing opening.
Tip: Listen for a subtle click when the housing locks into place. - 6
Run the fridge and check for performance
Allow the fridge to run a few minutes and monitor for even cooling and any unusual odors. If air seems stuffy, inspect the seal and reseat the filter. A newly installed filter should improve air quality and odor control over time.
Tip: If odors persist after replacement, check for other sources inside the fridge or pantry. - 7
Document the replacement and recycle the old filter
Record the replacement date in a maintenance log and note the filter model for future reference. Recycle or dispose of the old filter according to local guidelines. Consider keeping a spare filter on hand for the next replacement cycle.
Tip: Keeping a simple log simplifies future maintenance and budgeting.
FAQ
How often should I replace the refrigerator air filter?
Most fridges use a replaceable filter and manufacturers suggest following the specified interval in the manual. If airflow drops or odors return, replace sooner. Always follow the model’s recommended schedule.
Most fridges have a set replacement interval in the manual; replace when you notice reduced airflow or odors.
Can I clean or reuse a fridge air filter?
In most cases, refrigerator filters are designed to be disposable. Cleaning can push debris deeper into the system and reduce filtration efficiency. It’s best to replace with a new filter.
Typically, you should replace the filter rather than try to clean it.
What if my fridge doesn’t have a visible filter?
Some models hide the filter behind a grille or inside a rear housing. Check the manual or the service guide for the exact location and replacement procedure.
If you can’t locate a filter, check the manual or contact the manufacturer’s support.
Are there different filter types for different brands?
Yes. Filters are designed to fit specific models and brands. Using an incompatible filter may reduce filtration efficiency or cause leaks. Verify the part number before purchase.
Yes, filters must match your model; confirm the part number first.
Will replacing the filter improve odor and cooling performance?
A fresh filter typically reduces odors and helps maintain consistent airflow, which supports cooling efficiency. If odors persist, investigate seals, gaskets, or other defrost/airflow issues.
A new filter helps odors and airflow, but other fridge issues can affect cooling.
Where can I buy compatible filters for my refrigerator?
Check your manual for the exact part number and shop from authorized retailers or the manufacturer’s site. Local home improvement stores often carry compatible replacements as well.
Most retailers or the manufacturer’s site will have compatible filters.
Watch Video
Quick Summary
- Identify the correct filter model before purchase.
- Replace filters at manufacturer-recommended intervals.
- Install with correct orientation and seal.
- Keep a simple maintenance log for dates.
- Dispose of used filters responsibly.