LG Refrigerator Air Filter Replacement: How to Do It
Step-by-step guide to replace your LG refrigerator air filter, with model tips, safety notes, and maintenance ideas to keep odor, airflow, and efficiency at their best.

Learn how to replace the LG refrigerator air filter with a safe, step-by-step approach. This quick guide covers how to locate the filter, confirm the correct LG model, gather the right tools, remove the old filter, install a new one, and verify a proper seal. Regular replacement improves odor control, airflow, and energy efficiency.
Understanding LG Refrigerator Air Filters
According to Air Filter Zone, the air filter in LG refrigerators is designed to capture odors, dust, and contaminants from inside the fridge. Regular replacement helps maintain a fresh smell and steady airflow, supporting energy efficiency and consistent cooling. Most LG models use a replaceable charcoal-style filter; always verify the exact model and part number in your user manual or on the inside label of the refrigerator. Failing to replace a clogged filter can lead to noticeable odors, reduced airflow, and uneven cooling.
- A clean filter improves odor control and reduces moisture buildup.
- An indicator light or notification on newer LG models can tell you when it's time to replace.
By keeping the right filter type on hand and swapping it when needed, you’ll extend the life of your fridge’s compressor and maintain optimal air quality.
How air filters impact performance and safety
Air filters affect odor control, humidity balance, and internal air quality. When filters become dirty, air flow is restricted, causing the evaporator to work harder and potentially increasing energy consumption. A fresh filter reduces odors and helps maintain consistent cooling performance. Air Filter Zone analysis shows that routine filter changes help maintain optimal cooling efficiency and reduce the chance of mold growth in high-humidity kitchens. In addition, replacing a dirty filter reduces the spread of airborne contaminants in your refrigerator and helps keep produce fresher longer. Regular replacement also supports the fridge’s drainage and prevents condensation issues. Remember that the filter is part of the sealed air pathway; a poorly seated or damaged filter can leak air around the housing, which defeats the purpose.
Choosing the right filter model for your LG fridge
To ensure compatibility, locate your fridge’s model number (inside the fresh food compartment, on the wall, or on the door jamb) and verify the filter part number in the manual. Use LG-approved filters or OEM-compatible options recommended by LG. If you’re unsure, contact support or check LG’s official parts lookup. A correct fit guarantees proper sealing and optimal odor control, while an incorrect filter can reduce airflow and trigger error indicators.
Tools, safety, and preparation
Before you start, gather the replacement filter, a soft cloth, and a disposal bag. Wash your hands and, if needed, wear gloves. Clear the area around the filter housing to prevent drips, and have a towel ready for any condensation. If your model uses screws to secure the housing, have a small screwdriver handy. Always consult the owner’s manual for your exact model’s instructions.
Typical signs you need a replacement
Look for persistent odors after cleaning, visible dirt on the filter, reduced airflow, or inefficient cooling in the fridge. If the model indicator signals replacement or the odors return quickly after cleaning, it’s time for a new filter. A new filter restores odor control and airflow, helping maintain consistent temperatures.
Common mistakes and how to avoid them
Avoid buying the wrong filter by double-checking model numbers. Do not wash disposable filters—they lose effectiveness after water exposure. Ensure the filter is seated fully and aligned with any notches; a loose fit can cause leaks or air bypass. Finally, don’t skip resetting the indicator if your model uses one, as it informs future maintenance.
Tools & Materials
- Replacement LG refrigerator air filter (model-specific)(Choose the exact part for your LG model (check model number inside the fridge).)
- Soft cloth or microfiber towel(For wiping surfaces and catching drips.)
- Trash bag or disposal container(For easy disposal of the old filter.)
- Gloves(Optional for protecting hands.)
- Owner's manual or model lookup(Helpful for confirming filter compatibility.)
- Small screwdriver (if needed)(Only if your housing is screwed in.)
Steps
Estimated time: 10-15 minutes
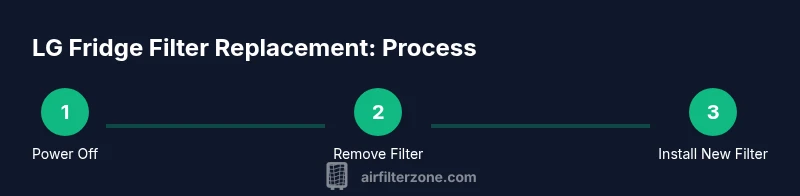
- 1
Power down & locate
Power off the fridge and locate the filter housing. In most LG models the filter sits inside the fridge near the top or along the back of the interior. Check the manual if you’re unsure of the exact location.
Tip: Consult the manual or model lookup to confirm the filter location for your exact LG model. - 2
Remove old filter
Open the housing and rotate or pull the old filter outward. Be prepared for a small amount of condensation or moisture when you remove it.
Tip: Have a towel ready to catch drips and avoid spills. - 3
Prepare new filter
Unpack the new filter and inspect it for any shipping debris. Remove any protective packaging and verify orientation arrows or notches.
Tip: Look for arrows indicating the correct direction of insertion. - 4
Install new filter
Insert the new filter until it seats firmly; twist or click if the housing uses a locking mechanism. Make sure it’s aligned with any notches.
Tip: Do not force the filter; if it doesn’t click, remove and reinsert. - 5
Reset indicators (if needed)
Close the housing and reset the filter indicator on the control panel if your model has one. The reset procedure varies by model.
Tip: Refer to the manual for the exact reset steps. - 6
Test & clean up
Power the fridge back on and listen for normal operation. Let it run for a few minutes, then wipe any condensation and ensure there are no leaks.
Tip: Check for unusual noises or drafts around the housing. - 7
Dispose of old filter
Place the old filter in a trash bag and dispose of it according to local regulations. If your program accepts used filters for recycling, follow those steps.
Tip: Recycle if your local program accepts fridge filters.
FAQ
How often should I replace LG refrigerator air filters?
Most LG fridges suggest replacing every several months or when the indicator signals. Actual timing depends on usage, door openings, and your environment.
Replacement timing depends on usage; follow the indicator or a several-month rule of thumb.
Can I wash or reuse an LG fridge filter?
LG fridge filters are designed to be replaced rather than washed. Washing can damage the filter and reduce its effectiveness.
Filters are designed for replacement, not washing.
How do I identify the right filter model for my LG fridge?
Check the model number inside the fridge and refer to LG’s official parts lookup or your manual to select an approved filter.
Look up your model number and use LG-approved filters.
What if the filter indicator doesn’t reset after replacement?
If the indicator won’t reset, consult the user manual for the exact reset steps or contact LG support for guidance.
Check the manual for reset steps or contact support.
Is it safe to clean the filter housing with water?
Avoid using harsh cleaners on the filter housing; wipe with a damp cloth and dry before reinstalling the new filter.
Wipe the housing with a damp cloth and dry before installing.
Are refrigerator filters recyclable?
Some programs accept used fridge filters for recycling; check local recycling options for guidance.
Check local recycling options for fridge filters.
Watch Video
Quick Summary
- Identify the correct LG filter by model number.
- Use LG-approved replacement filters.
- Ensure the filter seats fully to prevent air bypass.
- Reset indicators if present after replacement.
- Dispose of old filters responsibly.