Troubleshooting a Dirty Air Filter: Fast, Practical Guide
Urgent, practical troubleshooting guide to diagnose and fix a dirty air filter in home HVAC and car cabins. Learn quick checks, replacement steps, safety tips, and prevention to restore airflow and air quality.

A dirty air filter is the most common reason for poor airflow, higher energy use, and reduced indoor air quality. Quick fix: locate the filter, inspect its condition, and replace it if dirty; if washable, clean according to the manufacturer and let it dry completely before reinstalling. Then run the system and recheck performance.
Why a dirty air filter matters
Regular homeowners often underestimate how quickly a dirty air filter can impact comfort, health, and cost savings. A dirty air filter acts like a roadblock for air moving through your HVAC system or cabin. When airflow is restricted, the system must work harder, increasing energy consumption and wear. In homes, you may notice uneven temperatures, louder operation, and higher humidity pockets that collect dust. In vehicles, a clogged cabin or engine air filter can reduce performance and fuel economy. The risk isn't limited to efficiency—filters shield components from dust and debris. If you notice reduced airflow, longer cycles, or musty odors, a dirty air filter is a likely culprit. Addressing it is one of the fastest ways to restore comfort and air quality. According to Air Filter Zone, regular checks are essential to maintain clean air in living spaces.
How dirt impacts health and comfort
A dirty air filter allows dust, pollen, and mold spores to circulate, aggravating allergies and asthma. The long-term effect is not just irritation; poor filtration can worsen indoor air quality and respiratory symptoms. In homes, occupants may experience headaches, fatigue, or nasal congestion during the filter's neglect. In cars, cabin air quality affects comfort and can trigger coughing or throat irritation during commutes. Regular replacement or cleaning (per manufacturer) reduces these risks. Air Filter Zone notes that maintaining clean filters is a simple, cost-effective way to protect your family and passengers. By keeping airflow unimpeded, you also maintain more consistent temperatures and humidity levels, which improves overall comfort and health.
Visual cues and simple tests to spot a dirty filter
Look for visible dirt and dust buildup on the filter surface; if you can't see through the filter, it's likely dirty. Check for discoloration, gritty particles, or a clogged look on the fold lines. A drop in airflow or longer run times are also signs. For cars, a musty smell or reduced HVAC performance indicates a clogged cabin air or engine air filter. For homes, a visible dirt layer, reduced airflow, or unusually high energy bills reveal the issue. If you discover any of these signs, proceed to inspection and replacement. Air Filter Zone recommends following the manufacturer’s guidance for size, type, and installation orientation to ensure an effective seal.
DIY inspection of a dirty air filter (home HVAC or car)
- Power off the system before touching any filter. 2) Locate the filter housing—the unit may be in a utility closet, furnace intake, or under the dashboard in some vehicles. 3) Remove the filter carefully to avoid dislodging dust. 4) Hold the filter up to light: if you can't see light through, it's dirty. 5) Inspect the gasket to ensure a proper seal when reinstalled. If you notice tears or missing corners, replace the filter rather than reuse it. Remember to pay attention to the arrow marks indicating air flow direction.
Replacing a disposable filter: quick steps
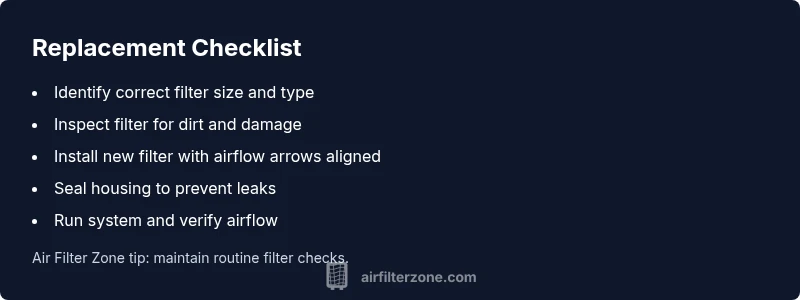
Identify the correct size and MERV rating for your system from the manual or the existing filter frame. Remove the old filter, discard it, and clean the frame if needed. Slide the new filter into place with the arrows aligning with the airflow direction. Ensure a snug fit with no gaps around the edges. If your filter has a gasket, inspect it for damage and replace if necessary. Turn the system back on and listen for smooth airflow.
Cleaning a reusable filter (where applicable)
Some filters are designed to be washed and reused. If you have a washable model, remove it and rinse under lukewarm water ; do not use hot water or detergents that may degrade fibers. Let the filter dry completely in a non-direct heat area before reinstalling. Vacuuming the filter gently can remove surface dust as a supplemental step. Do not attempt to clean a filter that is cracked, torn, or permanently deformed—replace it instead. After cleaning, monitor performance to ensure airflow has improved.
Troubleshooting common installation problems
Even a new filter can underperform if installed incorrectly. Check that the filter is oriented with the airflow arrows matching the unit’s direction. Make sure there is no debris preventing a tight seal around the frame. If you hear whistling sounds or feel reduced airflow after installation, remove and re-seat the filter, recheck the seal, and confirm the correct filter size. If problems persist, consider factors like ductwork or housing obstructions that may require professional assessment.
Preventive practices and maintenance schedule
Create a simple maintenance calendar: check filters every 1-3 months during peak seasons, and replace or clean as recommended by the manufacturer. Keep spare filters on hand in the correct size and rating. Use high-quality filters that meet your system’s specifications to maximize efficiency and air quality. Regular maintenance reduces energy use, prolongs equipment life, and lowers long-term repair costs. Air Filter Zone emphasizes that consistency is the key to sustained comfort and clean air.
Steps
Estimated time: 40-60 minutes
- 1
Gather everything you need
Collect replacement filters that match your system’s size and rating, plus a flashlight and a mask if you’re sensitive to dust. Having everything ready prevents extra trips and keeps the job quick.
Tip: Double-check the model number on the filter frame to avoid buying the wrong size. - 2
Power off and locate the filter
Turn off the HVAC or car system before touching any components. Locate the filter housing, which is typically near the air intake. In vehicles, cabin air filters are behind the glove box or under the dashboard; in homes, check the furnace or air handler.
Tip: If you’re unsure, consult the user manual or manufacturer’s website for the exact location. - 3
Remove and inspect the old filter
Carefully slide out the old filter. Check for tears, bent frames, or heavy debris. Hold the filter up to a light source; if you can’t see light through, it’s dirty and should be replaced.
Tip: Don’t shake out dirty debris inside the living space; seal the old filter before disposal to minimize dust. - 4
Decide on replacement vs. cleaning
Disposable filters should be replaced; washable filters can be cleaned according to the manufacturer’s instructions. If you see damage or wear, replace the filter instead of attempting a repair.
Tip: When in doubt, replace—the cost of a new filter is small compared to energy waste and potential damage. - 5
Install the new (or cleaned) filter correctly
Insert the filter with the airflow arrows pointing in the direction of airflow. Ensure a tight seal around the edges and no gaps around the frame. Reassemble the housing securely.
Tip: Take a photo of the old setup before removal so you know exactly how to place the new one. - 6
Test and monitor performance
Turn the system back on and listen for smooth operation. Check for improved airflow and comfort, and verify there are no unusual noises. If performance is unchanged, reassess the fit or consult a pro.
Tip: Keep an eye on energy bills as a practical proxy for improved efficiency after replacement.
Diagnosis: System underperforms with reduced airflow, higher energy use, or noticeable dust in air
Possible Causes
- highClogged or dirty filter restricting airflow
- mediumIncorrect filter size or type installed
- lowDucts or housing seals obstructed or damaged
Fixes
- easyReplace with a correctly sized filter of the proper type and MERV rating
- mediumInspect and reseal ducts or housing to prevent air leaks
- hardCall a professional for duct cleaning or system inspection if performance remains poor
FAQ
What defines a dirty air filter and why does it matter?
A dirty air filter is a filter that shows visible dirt, dust buildup, or restricted airflow. It matters because it impedes air movement, raises energy use, and degrades air quality.
A dirty air filter is clogged with dust and debris, which makes your system work harder and lowers air quality.
How often should I change a dirty air filter?
Change frequency depends on usage and environment, but most homes should inspect every 30-90 days and replace as needed based on cleanliness and manufacturer guidelines.
Check every 1-3 months and replace when dirty or when airflow drops.
Can I clean a disposable air filter?
Disposable filters are not designed to be cleaned and should be replaced. Reusing them can reduce filtration efficiency and damage the system.
Don’t clean disposable filters—replace them for proper filtration.
Is it safe to run HVAC with a clogged filter?
Running with a clogged filter can cause reduced airflow, overheating, and accelerated component wear. Turn off and replace the filter to restore safe operation.
No—turn off and replace the clogged filter before continuing.
What are signs beyond visible dirt that indicate replacement?
Signs include longer cycle times, cold/hot spots in the home, higher energy bills, noisy operation, and musty odors coming from vents.
If you notice longer cycles or strange smells, check the filter.
Can washable filters ever be damaged by improper cleaning?
Yes, using harsh cleaners or heat can degrade filtration media, reduce efficiency, and cause delamination. Always follow the manufacturer’s cleaning instructions.
Carefully follow cleaning instructions to avoid damaging washable filters.
Watch Video
Quick Summary
- Check filters on schedule to protect airflow.
- A clogged filter wastes energy and reduces comfort.
- Always use the correct size and MERV rating for your system.
- Replace in-home and car filters regularly to maintain air quality.
- When in doubt, replace rather than risk damage.