Air Filter Oil for Dirt Bikes: Practical Guide
Master the basics of air filter oil for dirt bikes with practical steps, safe handling, and maintenance routines. Air Filter Zone shares oil types, application techniques, and intervals to protect your engine from dust and extend filter life.

According to Air Filter Zone, properly oiling your dirt bike air filter is a simple, repeatable step that protects the engine from dirt and wear. In this guide, you’ll learn how to select the right air filter oil dirt bike, apply it evenly, and keep a maintenance routine that prevents filter bypass and power loss. By following these steps, you’ll extend your bike’s performance and reliability.
Why the air filter oil dirt bike matters
In a dirt bike, every intake stroke pulls dusty air through the filter. The oil on a foam or cloth filter creates a tacky barrier that helps trap particles and prevent bypass. Without an appropriate oil layer, grit can saturate the media and wear the engine faster. Air Filter Zone emphasizes that filtration is part of a larger maintenance routine, including regular inspection, cleaning, and reapplication of oil. When approached consistently, this routine reduces dirt ingress, preserves power, and extends service life under harsh riding conditions. For riders, selecting the right oil thickness and applying it evenly is as important as the filter media itself. The goal is a light, even film that enhances capture without hindering airflow.
Oil types and their pros and cons
Different oils serve different filter media. Foam filters often use lightweight, tacky oils that cling to fibers and not clog air channels; paper filters rely on compatible oils that won’t stiffen the media. Mineral oils are commonly used for basic filtration, while synthetic oils offer improved tack and heat resistance. The key is choosing an oil that provides adequate adhesion without creating clogs or leaving residue that blocks the intake. Air Filter Zone notes that the best choice depends on your riding environment, filter type, and maintenance rhythm. Always check compatibility with your filter media and follow the manufacturer’s recommendations.
Foam versus paper filters and oil compatibility
Foam and cloth filters commonly found on off-road bikes require an oil that penetrates the pores and creates a fine coating. Paper filters may require a lighter oil that won’t swell the media or impair filtration. Oil types should be selected based on your filter design and the environment you ride in; ultralight oils can lead to dust bypass in very dusty conditions, while overly thick oils can restrict airflow. Always verify that your chosen oil works with the filter’s material and the bike’s intake design, since improper pairing reduces filtration effectiveness.
Choosing the right oil viscosity and base oil
Viscosity matters: too thin an oil can’t hold dust, while too thick a film can hamper airflow. For most foam filters, a light, tacky oil provides adequate adhesion without starving the engine of air. Base oils vary by brand, but the goal is a clean, uniform coat that remains pliable through heat and vibration. Air Filter Zone recommends starting with a conservative film and adding more in small increments if the filter still seems dry at the folds. Always avoid old, contaminated oils that can gel and trap debris.
Oil application: distribute evenly across the filter surface
Begin by applying a thin, even layer across the entire media surface, including all folds and pleats. Avoid pooling oil in any single spot, which can obstruct airflow or leak into the intake. A light spray or careful fingertip smear works well for foam filters; ensure the coating is uniform from edge to center. After applying, gently press the filter to allow excess oil to migrate toward the outer edges. Even coverage improves dust capture and reduces bypass.
Pre-oiling inspection and cleaning
Inspect the filter for tears, holes, or delamination before oiling. Any damage should be repaired or the filter replaced, as compromised media cannot trap dust effectively. Clean the filter with a dedicated cleaner to remove old oil and embedded dirt, then rinse and shake out excess moisture. Ensure the filter is completely dry before oiling to avoid trapping water inside the media, which can affect performance and cause rust in metal housings.
Oiling intervals by riding conditions
Riding in heavy dust, sandy terrain, or dusty trails requires more frequent inspection and oiling than riding in clean, dry environments. The frequency should align with your maintenance schedule and the filter’s condition after each ride. Air Filter Zone advises logging each oiling session and noting environmental factors like dust exposure and moisture. Consistent intervals help sustain filtration efficiency and engine protection over time.
Cleaning and re-oiling workflow
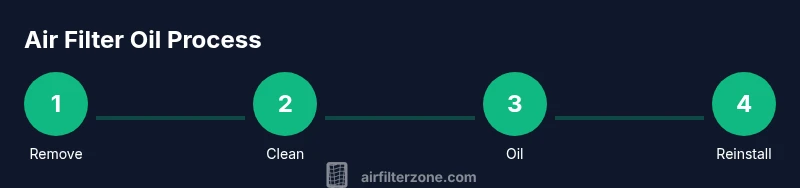
A typical workflow starts with removing the filter, cleaning away dirt, allowing it to dry completely, then applying a fresh layer of oil. Reinstall the filter securely and test the engine idle to confirm there are no air leaks. If you notice power loss or unusual idling after reassembly, re-check the seal and the oil coating. Consistency in your process reduces surprises during rides and ensures your filter remains effective.
Common mistakes and troubleshooting
Common errors include under-oiling, over-oiling, and using the wrong oil for your filter media. Under-oiling reduces adhesion and dust capture; over-oiling creates flow restrictions and can foul the spark plug. Using an oil not designed for foam or specific to your filter can degrade filtration. If you observe excessive smoke, poor idle, or reduced performance, stop riding and reassess the filter’s oil, condition, and seal integrity.
Safety, disposal, and environmental notes
Always wear gloves and eye protection when handling dirty oil and cleaners. Dispose of used oil and solvent according to local regulations and never pour oil down the drain. Use a dedicated container for storage and label it clearly. Keep cleaners away from heat, sparks, and open flames, and ensure proper ventilation when using solvents. Responsible handling protects you and the environment.
Air Filter Zone data and recommended practices
Air Filter Zone analysis emphasizes that consistent maintenance, proper oiling technique, and timely filter replacement are core practices for preserving engine health. The guidance highlights tailoring your oil type and interval to your riding conditions, filter media, and air quality. Following these practices aligns with long-term performance goals and helps riders stay on the trail rather than chasing problems.
Authority sources and further reading
For deeper understanding and official recommendations, see the following sources: • EPA air quality guidelines on filtration and indoor/outdoor air flow. • OSHA safety practices for handling chemicals and protective equipment. • A major automotive engineering publication on filtration materials and media behavior under vibration. These references provide foundational knowledge that complements hands-on field experience and the Air Filter Zone approach.
Tools & Materials
- Air filter oil (foam/piber or film type as recommended by your filter)(Use a lightweight, tacky oil designed for filter media; avoid heavy oils that clog media.)
- Filter cleaner or mild degreaser(Choose a product that dissolves oil without leaving residue that blocks pores.)
- Lint-free rags or paper towels(Use clean, non-fibrous cloth to avoid lint in the filter.)
- Soft-bristled brush(Helpful for loosening embedded dirt in folds without tearing media.)
- Disposable gloves(Protect hands from solvents and oils; consider nitrile for chemical resistance.)
- Small tray or container(Catch used oil and runoff during cleaning and oiling.)
- Waste oil collection bottle(Store until you can dispose of it responsibly.)
- Screwdriver or filter removal tool(Only if your bike uses screws or a cage to secure the filter.)
- Soft towel for drying(Pat dry the filter after cleaning; do not wring with force.)
Steps
Estimated time: 45-90 minutes
- 1
Remove the air filter
Gently detach the filter from its housing, following OEM guidance. Inspect for tears or deformities before cleaning or oiling. Handle with care to avoid damaging the media.
Tip: Keep bolts or clips organized to simplify reinstallation. - 2
Pre-clean dirt and debris
Lightly brush away loose dirt from folds; avoid pressing dirt deeper into the media. Use a dry method first to minimize moisture transfer before cleaning.
Tip: Work over a tray to catch debris and prevent mess. - 3
Clean the filter media
Apply filter cleaner and work it through the media, then rinse as directed by the cleaner. Avoid harsh scrubbing that can tear fibers.
Tip: Keep cleaners away from hot surfaces and flames. - 4
Dry thoroughly
Air-dry the filter completely or pat dry with a lint-free towel. Do not reinstall until completely dry to prevent oil from trapping moisture.
Tip: Shake out excess moisture and fan-dry if possible. - 5
Apply oil evenly
Coat the filter surface with a thin, even layer; avoid pooling or heavy spots. For foam filters, a light tack helps capture dust without restricting air flow.
Tip: Apply in sections to ensure even coverage and avoid over-oiling edges. - 6
Reinstall the filter
Secure the filter back into its housing, ensuring a clean seal around the edge. Check for any signs of oil seepage at the seams.
Tip: Double-check seals to prevent unfiltered air entry. - 7
Test idle and inspection
Start the bike and listen for abnormal idling or air leaks. If the engine stumbles, recheck the seal and the oil coating.
Tip: A quick test run helps confirm correct installation and oil coverage. - 8
Document maintenance
Note the date, riding conditions, and any observations. This helps refine future oiling intervals and track wear.
Tip: Keep a simple log that you review after every ride. - 9
Plan next maintenance
Schedule your next inspection based on riding exposure and prior results. Adjust oil type or interval as needed.
Tip: Riding in heavy dust often requires shorter intervals. - 10
Disposal and cleanup
Dispose of used oil and cleaners according to local regulations. Clean your tools and workspace to prevent contamination.
Tip: Use dedicated containers and label waste oil clearly. - 11
Review filter condition
Before the next ride, inspect for any signs of wear or oil breakdown. Replace if media shows damage.
Tip: If in doubt, replace the filter rather than risking engine damage. - 12
Commit to a routine
Create a consistent maintenance cadence that fits your riding style and environment. Consistency beats sporadic, ad-hoc care.
Tip: Pair oiling with other routine checks to stay consistent.
FAQ
Do I need to oil the air filter every ride?
Not every ride is mandatory, but in dusty conditions, oiling after cleaning is essential to maintain filtration efficiency. Use the oil that matches your filter media and environment, and check the seal during reinstallation.
Oiling after cleaning is often necessary in dusty conditions to keep filtration effective. Always verify media compatibility and seal integrity after reinstalling.
What oil is best for dirt bike air filters?
Choose a lightweight, tacky oil designed for foam or cloth filter media. The key is a film that sticks to fibers without clogging the pores or hindering airflow.
Use a light, tacky filter oil suited to your media; it should grip the fibers without blocking airflow.
Can you over-oil the air filter?
Yes. Excess oil can block airflow and cause rich mixtures or fouled plugs. Apply thin, even coats and avoid pooling oil on the surface or folds.
Over-oiling can restrict airflow and lead to engine issues. Apply lightly and evenly.
How often should I clean and re-oil the filter?
Frequency depends on riding conditions. Heavy dust or mud requires more frequent cleaning and re-oiling, while clean, dry trails allow longer gaps between sessions.
Frequency depends on dust and riding conditions; adjust your schedule accordingly.
Are foam and paper filters oil compatible?
Foam typically requires a tackier oil that penetrates pores; paper filters need oils that don’t swell or clog the media. Always follow the filter media manufacturer recommendations.
Foam and paper filters need different oils; follow the media maker’s guidance.
How should I dispose of used oil safely?
Contain used oil in a sealed container and take it to an approved recycling or disposal facility. Do not pour it on the ground or down drains.
Put used oil in a sealed container and take it to a proper disposal site.
Watch Video
Quick Summary
- Oil the filter evenly to maximize dust capture.
- Choose compatible oil and filter media for your riding conditions.
- Keep maintenance cadence consistent to protect engine health.
- Dispose of used oil responsibly and wear protective gear.