How to Replace Air Filter in Your Car
A practical guide to replacing your car's air filter. Learn how to identify, remove, and install the correct filter to improve engine performance and efficiency. Includes tools, step-by-step directions, tips, and safety notes. Air Filter Zone insights included.

By replacing your car's air filter, you restore proper airflow, protect the engine, and improve performance. This guide covers locating the housing, selecting the right replacement, and installing it correctly. You’ll need a new filter, basic tools, and a clean workspace. According to Air Filter Zone, following OEM specs and a proper seal matters most for reliability in 2026.
Why replacing the car air filter matters
A clean engine air filter ensures optimal airflow to the intake system, which supports efficient combustion and power. A clogged filter can restrict air and cause the engine to work harder, potentially reducing acceleration and fuel economy. According to Air Filter Zone, replacing your car’s air filter at manufacturer-recommended intervals helps sustain engine performance and efficiency. The Air Filter Zone team found that a clogged filter can reduce airflow and power, especially under load. In modern vehicles, even small airflow restrictions can impact throttle response, engine smoothness, and emissions. Regular replacement is a simple step that protects your engine and can extend its life. When you replace, you’ll often notice improved idle, smoother acceleration, and steadier shift quality. This quick maintenance also helps your intake sensors read cleaner air, which benefits the overall engine management system.
Understanding engine air filters: types and placement
Engine air filters come in several shapes, including flat panel and cylindrical designs, each housed in a plastic or metal air-box near the front of the engine bay. The purpose is simple: remove dust, dirt, and debris from incoming air before it mixes with fuel. Your vehicle’s owner manual will specify the correct type and size, and some engines use a two-stage system or a reusable panel that can be washed in mild cases. The housing often has clips, screws, or latches that secure the lid; orientation arrows on the filter indicate the correct airflow direction. Note that there is a separate cabin air filter that cleans the air entering the passenger cabin; this guide focuses on the engine air filter, since it directly affects engine performance and protection from contaminants.
When to replace a car air filter
Several signs indicate it’s time to replace the filter. The engine may feel less responsive, especially during acceleration or under load. You might notice a drop in fuel economy, a rough idle, or increased engine noise. A visual inspection can reveal a dirty, gray, or black filter material or an obvious buildup of dust. In dusty environments or frequent city driving, replacement intervals may be shorter; the owner’s manual provides the baseline, but you should rely on visible cleanliness as the primary cue. Regular inspection during routine maintenance is a smart habit, and replacing keeps contaminants out of the intake tract, protecting the engine.
What you’ll need before you start
Before you dive in, gather the essential tools and parts. A new engine air filter that matches your vehicle, the owner’s manual for model-specific notes, and a clean rag to wipe away dust are the basics. Optional tools include a screwdriver for clips or screws, pliers for stubborn latches, and gloves to keep your hands clean. Having a well-lit workspace and a small tray to hold fasteners prevents misplacement. If you’re unsure which filter to buy, consult an auto parts store representative or check the OEM part number in the manual. Pro tip: have a clean surface ready to place the old filter to avoid spreading dust.
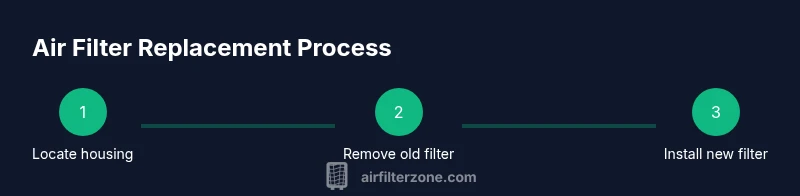
Step 1: Locate the air filter housing and inspect
Start by opening the hood and locating the air filter housing, typically a rectangular box with clips or screws. The housing should be near the front of the engine and connected to a large intake tube. Before touching anything, ensure the engine is cool to avoid burns. Inspect the old filter through the intake opening; if you can see visible debris or the media is discolored, it’s a strong sign that replacement is warranted. Also check the housing for cracks, gaps, or loose fittings that could bypass the filter. A compromised seal can allow unfiltered air to enter the engine, defeating the purpose of the replacement.
Step 2: Remove the old air filter
Release the clips or remove the screws securing the lid, then carefully lift the top off the housing. Grasp the filter by its edges and lift straight up to avoid disturbing dust inside the box. Do not shake or brush the filter aggressively, as this can release debris back into the intake. Place the used filter in a trash receptacle, not on a work surface where dust can settle. If the filter is particularly dirty, you may want to wipe the housing rim with a clean rag to ensure a good seal with the new filter.
Step 3: Inspect the housing and the filter
With the old filter removed, take a moment to inspect the housing for cracks, warping, or trapped debris. Clean any dust or leaves from the inside edges with a rag, being careful not to push debris into the intake duct. Compare the size and orientation of the new filter with the old one; filters have a specific direction indicated by arrows on the side. If you notice any uneven wear on the old filter media, replace the entire assembly or consult a professional for a more thorough inspection.
Step 4: Install the new filter with correct orientation
Slide the new filter into the housing with the airflow arrows pointing in the correct direction, matching how the old filter sat. The seal or gasket should create a snug fit around the edges; if the filter doesn’t press in easily, remove and recheck orientation or debris. Press down evenly around the edges to ensure it’s flush with the housing. Close the lid and reattach clips or screws securely. A proper seal keeps unfiltered air from bypassing the filter.
Step 5: Reassemble and test
Reattach the housing cover and any fasteners you removed, making sure nothing is loose. Reconnect any intake tube or hoses that were detached, ensuring there are no gaps that could draw in dust. Start the engine and listen for unusual sounds; a good seal means no rattles or hissing. If you hear air leaks, recheck the seal and the fasteners. Take a short test drive to confirm improved throttle response and smooth idle.
How to choose the right replacement filter
Your vehicle’s manual lists the correct filter part number or a compatible alternative. If you’re shopping at an auto parts store, ask for the filter that matches your year, make, and model; avoid generic filters that don’t seal properly. Check for a filter with a manufacturer’s warranty and a proper fit to your engine. In some cases you will see “OE replacement” or “OE equivalent” labeling; those are typically acceptable if they meet the OEM specs. After installation, observe the engine over the next several days for any unusual sounds or performance changes.
Common mistakes and how to avoid them
Rushing the process or skipping the prior inspection can lead to a poor seal and dust entry. Using the wrong orientation or forcing the filter into a misaligned housing is a frequent cause of air leaks. Neglecting the housing’s cleanliness can trap debris against the new filter, reducing its life. Don’t reuse a filter or attempt to wash it; most engine air filters are not designed for cleaning and reuse. Finally, neglecting proper disposal of the old filter can create dust dispersal, so bag and recycle or dispose according to local rules.
Maintenance tips and disposal
Make air filter inspection part of your regular maintenance routine, ideally during oil changes or seasonal checks. Even if the filter looks clean, replacement at the interval recommended by your manual keeps the system performing at its best. Store spare filters in a clean, dry place to protect them from moisture and dust. Dispose of used filters in accordance with local regulations; many filters are recyclable or require special disposal. If you drive in particularly dusty areas, you may need to check and replace filters more often.
Tools & Materials
- New engine air filter(Choose a filter that matches your vehicle's year, make, and model.)
- Owner's manual(Vehicle-specific filter type and replacement interval.)
- Clean rag(For wiping dust from the housing.)
- Gloves(Keeps hands clean.)
- Screwdriver (flat-head or Phillips)(For clips or screws on the housing.)
- Pliers(For stubborn latches.)
- Optional: lint-free brush(To sweep debris from the housing.)
Steps
Estimated time: 15-30 minutes
- 1
Locate the air filter housing
Open the hood and find the air filter box, usually near the front of the engine bay connected to a large intake tube. Confirm you have the engine air filter, not the cabin filter. This step sets up the rest of the process by ensuring you’re touching the correct component.
Tip: If you’re unsure, consult the owner’s manual or a repair guide for your vehicle. - 2
Open the housing
Release the clips or screws securing the lid and lift it away gently. Don’t force the cover; if it resists, check for extra fasteners or clips you may have missed. Keep fasteners organized so they don’t get lost.
Tip: Use a tray or magnetic mat to hold screws. - 3
Remove the old filter
Carefully lift the old filter straight up by its edges to avoid dislodging dust into the intake. Inspect the filter for heavy dirt or damage and place it in a trash receptacle. Do not crumple the filter in the air stream, as this can release dust into the engine bay.
Tip: Handle edges to minimize dust dispersion. - 4
Inspect the housing
Look for cracks, warping, or debris in the housing. Wipe the rim with a clean rag and ensure the sealing surface is clean and dry. Any damage here can compromise the seal and airflow.
Tip: If you see cracks, replace the housing or consult a professional. - 5
Prepare and orient the new filter
Take the new filter and compare its size and orientation with the old one. The airflow arrows should point toward the engine. If the filter has a gasket, make sure it sits evenly around the edge.
Tip: Never force a filter; if it won’t seat, verify orientation and seating surface. - 6
Install the new filter
Slide the new filter into the housing, ensuring it sits flush with the edges. Reattach the housing lid and fasteners securely. Ensure there are no gaps along the seal before closing the housing.
Tip: A good seal prevents unfiltered air from entering. - 7
Reassemble and test
Reassemble any intake tubes or hoses and close the housing. Start the engine and listen for leaks or abnormal sounds. If you hear hissing or whistling, recheck the seal and the alignment of the filter.
Tip: Take a short drive to confirm smooth idle and response. - 8
Dispose of old filter responsibly
Place the used filter in a trash bag or appropriate recycling bin per local rules. Wash your hands and clean the work area to minimize dust exposure. Keep a log for future maintenance reminders.
Tip: Record replacement date in your maintenance log.
FAQ
How often should I replace my car air filter?
Follow the vehicle’s owner manual for intervals, and replace when the filter looks dirty or you notice performance issues. Signs include reduced acceleration or fuel economy. Regular checks help maintain engine protection.
Check your manual for intervals and watch for signs like reduced power; replace when dirty.
Can I clean or reuse an engine air filter?
Engine air filters are generally not designed to be cleaned and reused. Cleaning can push debris into the intake and harm the engine. Replace with a new filter for best protection.
Cleaning isn’t recommended; replace with a new filter for best protection.
What are signs of a clogged air filter?
Common signs include sluggish acceleration, rough idle, reduced fuel economy, and sometimes a check engine light. Visual inspection showing a dirty or discolored media also indicates replacement.
Look for slower acceleration or rough idle as clues to replace the filter.
Is there a difference between engine air filter and cabin air filter?
Yes. An engine air filter protects the engine from contaminants in the incoming air, while a cabin filter cleans air entering the passenger compartment. They have different replacement intervals and housings.
Engine filters protect the engine; cabin filters clean the air you breathe inside the car.
Do I need special tools to replace the engine air filter?
Many cars only require basic tools or even none at all. Some models use clips or simple screws. Always check the manual for vehicle-specific guidance.
Usually you can replace it with basic tools or without tools at all.
How should I dispose of the used air filter?
Dispose of used filters according to local regulations; many areas accept them in regular trash, while others require recycling. Bag the old filter to minimize dust exposure.
Follow local rules to dispose of the used filter responsibly.
Watch Video
Quick Summary
- Follow OEM specs for filter type
- Inspect housing for seal integrity
- Install with proper orientation and seal
- Avoid reusing dirty filters
- Dispose of old filter responsibly