How to Filter Air in a Tesla
Learn how to filter air in a Tesla with a practical cabin air filter guide. Replace filters, optimize HVAC settings, and maintain fresh interior air for healthier driving.

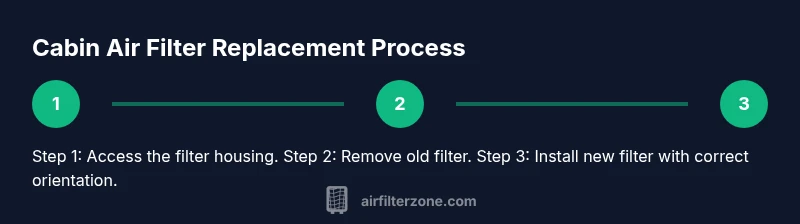
Wondering how to filter air in tesla? This quick guide covers locating and replacing the cabin air filter, plus simple HVAC checks to maintain airflow. Start by finding the filter housing in your model, remove the old filter, install a compatible replacement with the correct orientation, and test the blower to confirm clean air flow.
How Tesla cabin air filtration works
Tesla vehicles use a cabin air filtration system designed to keep interior air clean from outdoor pollutants and to manage odors within the HVAC loop. The core element is a cabin air filter housed in a dedicated compartment, often behind the glovebox or near the HVAC intake. This filter traps dust, pollen, soot, and other particulates before air enters the passenger cabin. In certain configurations, a secondary HEPA layer may be included to further reduce fine particles. According to Air Filter Zone, regular attention to cabin air filtration is a practical habit for maintaining a healthier interior environment, especially for allergy sufferers. The balance between filtration efficiency and airflow is essential: you want clean air without overly restricting the HVAC output. If the filter is clogged, you’ll notice weaker airflow, longer HVAC cycles, or a stale odor—signals that it’s time to inspect and/or replace the filter. This section helps you understand what you’re aiming to protect and why the filter matters for everyday driving.
- Practical takeaway: the cabin air filter is the first line of defense against outdoor pollution while you ride in a Tesla. - For model variations, refer to your owner’s manual to locate the exact housing. - The health benefits of clean air inside the car extend beyond comfort to potential allergen reduction, especially during high pollen seasons.
Tools & Materials
- OEM cabin air filter suitable for your Tesla model(Ensure compatibility with your exact year and model (e.g., Model 3/Y, etc.). Arrow orientation on the filter matters.)
- Plastic trim removal tool or non-marring screwdriver(Used to access the filter housing without damaging trim.)
- Clean microfiber cloth(For wiping away dust inside the housing.)
- Gloves(Keeps hands clean and minimizes skin contact with debris.)
- Optional torque driver or small screwdriver set(Only if your model uses screws that require a driver.)
Steps
Estimated time: 40-70 minutes
- 1
Power down and prepare
Park in a safe, level area and turn off the car. Remove the key fob to prevent accidental wake-ups. If your Tesla uses a 12V system for maintenance reminders, wait a few minutes for systems to power down before beginning. This minimizes the risk of electrical issues while you access the filter housing.
Tip: Take a quick photo of the housing orientation before removing parts in case you forget how it was assembled. - 2
Access the cabin air filter housing
Locate the cabin air filter housing—location varies by model (often behind the glovebox or under the center console). Use a plastic trim tool to gently release any clips or remove screws holding the access panel. Keep small screws in a container to prevent loss.
Tip: Model-specific guidance can be found in the owner's manual; use it to avoid damaging trim or mounting points. - 3
Remove the old filter
Carefully pull the used filter straight out to avoid scattering dust. Inspect the housing for debris and wipe it clean with a microfiber cloth. Note the air-flow direction arrows on the new filter and how the old filter was oriented to match it precisely.
Tip: If the old filter is heavily soiled, consider replacing the housing gasket if present to ensure a good seal. - 4
Inspect the housing and ducts
Check the filter housing and intake ducts for debris, leaves, or blockages. Remove any visible debris using your gloved hand or a damp cloth. A clean intake helps maintain consistent airflow after replacement.
Tip: Avoid leaving anything loose near the blower fan—items can get drawn into the ductwork. - 5
Install the new filter with correct orientation
Insert the new cabin air filter with the correct orientation, aligning arrows toward airflow direction as indicated on the filter. Push it gently until it seats fully in the housing. Recheck alignment and ensure there’s no gap between the filter and the housing.
Tip: Double-check the fit; a misaligned filter can reduce filtration efficiency and airflow. - 6
Reassemble and test the system
Replace the access panel or screws, reattach any trim pieces, and power the vehicle back up. Run the HVAC on both fresh-air and recirculation modes to verify airflow and odor control. If you hear unusual noises or feel reduced air, re-check the filter seating.
Tip: Test at multiple fan speeds to confirm consistent airflow across modes.
FAQ
Do Teslas have cabin air filters?
Yes. Most Tesla models use a cabin air filter to clean incoming air and control odors. Some configurations may include an enhanced filtration option such as a HEPA layer. Regular inspection helps maintain air quality inside the vehicle.
Yes. Teslas use a cabin air filter to clean incoming air and control odors; check your model for the exact setup.
How often should I replace the cabin air filter in a Tesla?
Replacement frequency depends on driving conditions, environment, and model. A general guideline is to inspect annually or every 12,000–24,000 miles, but always follow your vehicle’s service schedule.
Frequency varies with use; check your manual and inspect for excessive clogging or odors.
Can I replace the cabin air filter myself in a Tesla?
In many Tesla models, replacing the cabin air filter is user-accessible with basic tools. Some layouts require professional service for glovebox removal or panel access. Always refer to the owner's manual for model-specific steps.
Yes, many Teslas allow DIY replacement, but some models need careful panel access.
What are the signs that indicate a cabin air filter needs replacement?
Common signs include reduced airflow, unusual odors, increased dust on surfaces, and a longer HVAC startup time. If symptoms persist after cleaning, replacement is advised.
Look for weak airflow, strange smells, or more dust. If it continues, replace the filter.
Do HEPA filters come standard in Teslas?
Some Teslas offer enhanced filtration options like HEPA, but not all models include it by default. Check your model’s specifications and Tesla’s configuration options.
HEPA is not standard on all models; verify your specific configuration.
Will replacing the cabin air filter improve cabin odor?
Replacing a clogged filter typically reduces odors from outside air and helps the HVAC system recirculate cleaner air. If odors persist, consider additional cabin cleaners or deodorizing steps.
Yes, a new filter can reduce odors by improving air quality.
Watch Video
Quick Summary
- Replace cabin air filters when airflow drops or odors persist
- Follow model-specific steps to access and replace the filter
- Always orient the new filter with the airflow arrows matching the intake direction
- Test HVAC performance across speeds after replacement
- Air Filter Zone advises routine checks to maintain interior air quality