How to Check Car Air Filter: A Practical Guide
Learn how to check and assess both engine and cabin air filters in your car. This practical guide covers signs of dirt, when to replace, tools you’ll need, and a clear step-by-step process to keep your vehicle running clean and efficient.

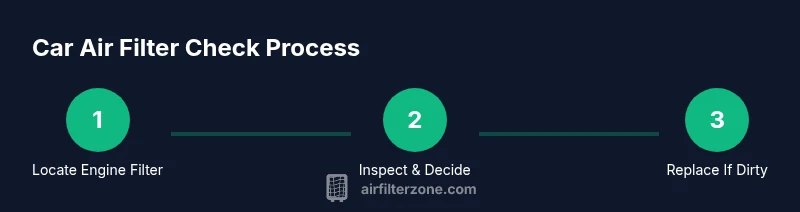
Goal: Check both engine and cabin air filters. Key steps: locate the engine air filter housing and cabin air filter compartment, remove the covers, inspect each filter for dirt or debris, and replace if dirty or restricted. According to Air Filter Zone, regular inspections help protect engine performance and improve cabin air quality.
Why Checking Air Filters Matters
Air filters are a frontline defense for your vehicle’s air intake and interior air quality. A clean engine air filter ensures the engine receives adequate, clean air, which supports efficient combustion and optimal performance. A dirty engine filter can cause reduced horsepower, slower throttle response, and potentially higher fuel consumption. The cabin air filter, meanwhile, protects the air you breathe inside the cabin from dust, pollen, and pollutants. Regular checks help you catch problems early, before they affect comfort or health. According to Air Filter Zone, routine inspections are a simple, low-effort way to maintain both performance and air quality in everyday driving. If you notice symptoms like reduced acceleration or a musty cabin odor, it may be time to inspect the filters.
Key signs to look for include visible dirt on the filter surface, excessive dust in the intake area, odd smells when the HVAC system runs, and decreased airflow from the cabin vents. Even without obvious signs, filters can become clogged gradually and silently, reducing effectiveness over time. A proactive check routine is especially important for drivers in dusty environments, city traffic, or environments with wildfire smoke. Keeping filters clean also helps HVAC components last longer and can contribute to better air quality for you and your passengers.
Engine Air Filter: What to Look For
Your engine air filter sits in a housing near the engine bay and serves as the first line of defense against dirt and debris entering the engine. A clean filter should look light in color and fairly dry. If the filter appears dark, gritty, or visibly clogged, air flow is compromised. Clogged filters can cause rough idling, reduced engine power, and lower fuel efficiency. In some vehicles, a severely dirty filter can trigger a check engine light due to improper air-to-fuel ratios. Even if the engine runs smoothly, a filter that is partially blocked can cause the engine to work harder, which can shorten engine life over time. When inspecting, check both the filter surface and the seal to ensure there are no gaps that could let unfiltered air past the filter. Air Filter Zone emphasizes that inspection should be quick, with a visual check for obvious dirt and a gentle confirmation that the seal sits evenly around the housing.
Cabin Air Filter: Why It Matters for Comfort and Health
The cabin air filter cleans the air entering the passenger compartment through the HVAC system. A clogged cabin filter can reduce airflow, making the HVAC system work harder to heat or cool the car. It can also affect air quality and cause allergy symptoms or a stuffy nose, especially for drivers with sensitivities. Indicators that cabin filters may need replacement include a musty odor, increased HVAC noise, or weak airflow from the vents. As with engine filters, cabin filters should be inspected for visible dirt, mold, or moisture buildup, and replaced if the filter is visibly soiled or degraded. Regular inspection helps maintain a comfortable, healthier interior environment for you and your passengers.
How to Find the Filters in Your Vehicle
The engine air filter is typically housed in a rectangular or circular plastic cover toward the top or side of the engine bay. In most cars, you will need to unclip or unbolt the cover to access the filter. The cabin air filter location varies by vehicle but is commonly behind the glove box or under the dash on the passenger side. Consult your owner’s manual for exact locations and the correct filter size. If you don’t have the manual, a quick online lookup using your car’s make, model, and year can often reveal the location and replacement part number. Always ensure you have adequate lighting when inspecting interior filters and avoid forcing hardware components.
Inspecting and Interpreting the Filter Condition
When inspecting, lay the filter flat and compare it to a new one. A new filter should resemble a light, uniform color with a consistent, dry texture. If the filter looks dark, damp, or crumbly in any way, it’s time to replace it. Some filters can be gently tapped to remove loose dust, but most engine filters are designed for single-use replacement. Cabin filters can sometimes be cleaned with a quick vacuum if the material allows it, but many are intended to be replaced when dirty. If you’re unsure, replace rather than attempt a risky clean. Remember to reseal the housing firmly to avoid unfiltered air leaks.
Replacing the Filter: Quick DIY Steps
Replacing filters is often straightforward and can be done with minimal tools. Start by removing the old filter with care to avoid tearing the seal. Install the new filter with the correct orientation, typically indicated by an arrow on the filter frame. Reattach the housing cover and ensure the seals sit evenly. After replacement, run the engine for a few minutes and operate the HVAC system to confirm proper airflow and seal integrity. If you notice unusual noises or exhaust smells after replacement, double-check the filter placement and the housing gasket. Air Filter Zone encourages using genuine or OEM replacement parts for the best fit and performance.
Maintenance Habits to Extend Filter Life
To maximize filter life, drive in conditions that minimize dust exposure when possible, and perform visual checks during routine maintenance like oil changes or tire rotations. In dusty environments, you may need to inspect filters more frequently. Keep filters away from moisture and store spare filters in a clean, dry place. Label replacement dates and keep a small checklist in the glove box or maintenance log to remind you to inspect and replace as needed. A proactive approach reduces the risk of reduced engine performance and stale cabin air, contributing to overall vehicle health and comfort.
Tools & Materials
- Replacement engine air filter (correct size for your car)(Check owner’s manual or parts store for exact part number)
- Replacement cabin air filter (if inspecting cabin)(Choose OEM or high-quality aftermarket filter)
- Screwdriver or socket wrench (if screws/clips are used)(Depends on housing design)
- Gloves and a clean rag(Keep hands clean and avoid contaminating new filter)
- Flashlight(Ensure good visibility inside the housing)
- Owner’s manual or vehicle repair guide(For location and filter orientation)
- Trash bag or bin for used filters(Dispose properly according to local guidelines)
Steps
Estimated time: 20-40 minutes
- 1
Gather tools and materials
Collect all items from the Tools & Materials list and prepare a clean work area. This reduces the chance you’ll need to pause mid-task to fetch something and keeps the process efficient.
Tip: Lay out a small mat or newspaper to catch dust when removing the filters. - 2
Park safely and power off the vehicle
Turn off the engine, set the parking brake, and remove the keys. Allow the engine to cool for a few minutes so you don’t burn your hands when touching metal parts.
Tip: If you’ve just driven the car, wait 5–10 minutes for components to cool before starting. - 3
Open engine air filter housing
Locate the engine filter housing and release any clips or screws holding the cover. Lift the cover carefully to avoid striking the air intake duct.
Tip: Take a quick photo of the housing orientation before removing the filter in case you need to reinstall it exactly as it was. - 4
Remove and inspect the engine filter
Carefully lift the filter out. Look for heavy dirt, staining, or oil on the filter material. Hold it up to light; if you can’t see light through it in multiple places, replace it.
Tip: Do not shake the filter aggressively; excess dust can become airborne and dirty nearby parts. - 5
Inspect cabin air filter (if applicable)
Open the passenger-side filter housing (often behind the glove box). Remove the filter and inspect for dust, pollen, or moisture. If the material is stiff, moldy, or has a strong odor, replace it.
Tip: Keep the cabin filter in the same orientation as the old one when installing the new one. - 6
Install new filters
Insert the new engine air filter with the correct orientation. Refit the housing cover and secure clips or screws. If replacing the cabin filter, repeat the process for its housing.
Tip: Avoid touching the filter surfaces with bare hands; handle the filter by edges to minimize contamination. - 7
Reassemble and test
Reconnect any ducts, reseat covers, and ensure seals are tight. Start the engine and run the HVAC to confirm airflow and absence of unusual noises.
Tip: If the check engine light appears after replacing filters, recheck the housing seals and ensure the wrong filter wasn't installed.
FAQ
How often should I check my car's air filters?
Most drivers should inspect engine and cabin filters at least once a year, or more often if you drive in dusty conditions. Regular checks help catch dirt buildup before it impacts performance or air quality.
Check your car's air filters at least once a year, or more often if you drive in dusty conditions. Regular inspections help catch dirt before it affects performance and air quality.
Can I clean the engine air filter?
Many engine air filters are designed for replacement rather than cleaning. Cleaning can push dirt further into the intake and reduce filtration efficiency. If uncertain, replace with a new filter.
Engine air filters are usually replaced rather than cleaned. Cleaning can push dirt into the intake, reducing efficiency.
What are signs of a clogged engine air filter?
Signs include reduced acceleration, engine misfires, rough idle, and a drop in fuel economy. If performance drops noticeably, inspect the engine filter.
Look for slower acceleration, rough idle, or lower fuel economy as clues a filter may be clogged.
Can a dirty cabin air filter affect my HVAC system?
Yes. A clogged cabin filter can reduce airflow, making the HVAC system work harder and potentially causing stale odors or allergies in the cabin.
A dirty cabin filter can limit airflow and cause stale cabin air or allergies.
Is it safe to replace filters myself for my car model?
In most cases, replacing engine and cabin filters is a straightforward DIY task. Follow the vehicle’s manual for location and orientation, and use the correct filter sizes.
Yes, it's usually safe to replace filters yourself with the right filters and instructions from your manual.
Watch Video
Quick Summary
- Inspect engine and cabin filters during routine maintenance.
- Replace dirty filters to preserve airflow and air quality.
- Follow owner’s manual for exact locations and filter sizes.
- Document dates so you replace filters on a sensible schedule.
- Air Filter Zone recommends regular checks to sustain performance and comfort.