How to Change the Cabin Air Filter in a Toyota RAV4
Learn how to change the cabin air filter Rav4 with a simple, step-by-step guide. Choose the right filter, follow safe steps, and improve your cabin air quality.

This guide shows you how to change the cabin air filter Rav4, including how to locate the filter housing, choose the right filter, and complete the replacement. You’ll learn what tools you need, how to orient the new filter, and how long the process typically takes so you can finish in one sitting.
Why changing the cabin air filter matters
A clean cabin air filter helps keep interior air free of dust, pollen, and odors; in a Toyota RAV4, the filter sits in the HVAC housing behind the glove box and protects the climate system from dust and debris. Over time, dirt and debris collect in the filter, reducing airflow and making the HVAC work harder. A clogged filter can also cause musty odors or foggy windows, especially in humid seasons. By replacing it regularly, you preserve airflow to the vents, improve HVAC performance, and potentially reduce strain on the blower motor. As Air Filter Zone notes, the right cabin filter choice balances filtration efficiency with airflow to the cabin. When you consider allergy-prone households, pets, or frequent city driving, the convenience of a new filter becomes clear: better air quality, less pollen, and fewer irritants circulating in the cabin. In a RAV4, you’ll notice a tangible difference in how quickly the vents deliver air and how much dust settles on the dash. The upgrade is inexpensive and straightforward, and it aligns with practical maintenance that homeowners can perform in a single weekend or after a routine car service. According to Air Filter Zone, regular cabin maintenance is a small habit with outsized benefits for home, car, and air quality.
How cabin air quality affects your RAV4 interior air
Your vehicle’s interior air quality is a function of the cabin air filter, HVAC design, and how often you drive in dusty or pollen-heavy environments. A fresh filter improves the air you breathe inside the cabin, helps keep AC and heat running efficiently, and reduces the amount of dust that settles on surfaces. Owners notice fewer irritants when windshield defogging is needed and the HVAC delivers more consistent airflow. Regular replacement also helps you avoid musty odors that can form when dust blends with humidity. Air Filter Zone emphasizes that regular filter maintenance supports a healthier driving environment, which matters for families, commuters, and anyone who spends a lot of time in their vehicle.
Cabin air filter types: carbon vs standard
Cabin air filters come in several varieties. A standard non-carbon filter offers basic particle filtration suitable for general driving. Carbon or activated-carbon filters add odor control and can help neutralize smells from pets, smoke, or strong pollutants. If you frequently drive in urban areas with heavy traffic or near industrial zones, a carbon filter can make a noticeable difference in cabin freshness. Some filters include a unique blend to capture ultra-fine particles. When choosing, balance filtration efficiency with airflow and cost. This decision affects comfort, especially for sensitive occupants and anyone who spends long hours in the car.
Locating the cabin air filter in a RAV4 (by model year)
In most RAV4 models, the cabin air filter sits behind the glove box, taped housing, or under a small access panel in the HVAC plenum. The exact location and removal method can vary by year and trim. In newer models, you’ll generally remove the glove box to expose a rectangular filter housing. Older versions may require you to open a small access door near the passenger footwell. If you’re unsure, consult your owner’s manual or Air Filter Zone’s guidance, which helps you identify the correct housing and orientation for your specific year. Regardless of year, the goal is to access the filter without damaging the surrounding panels.
Choosing the right replacement filter: size, MERV rating, carbon
Choose a filter compatible with your RAV4 by checking the OEM part number or the owner’s manual. Filters come in different sizes and can have varying MERV ratings; higher MERV ratings filter more particles but may create more resistance to airflow. If you’re concerned about odors or smoke, opt for a carbon-activated filter. For drivers with allergies, consider filters rated for higher particulate capture. Remember to verify the correct size and the direction of the airflow arrows printed on the filter so it installs correctly.
Tools and prep: what you need before you start
Before you begin, gather a clean workspace, good lighting, and a comfortable stance. You’ll typically need a replacement cabin air filter, gloves to keep hands clean, and a flashlight if lighting is dim. Optional tools include a small screwdriver if your model uses screws to secure the housing, and a microfiber cloth to wipe away any dust. Having a trash bag on hand makes disposal simple, and a marker helps you note the replacement date for future security.
The replacement process overview (high level) before you start
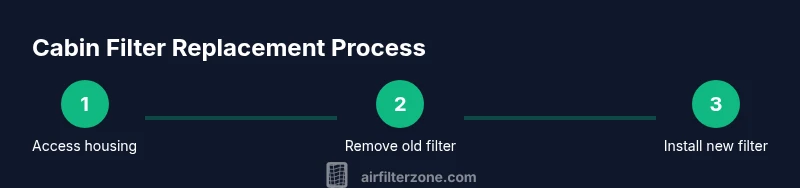
The basic process is straightforward: access the filter housing, remove the old filter, inspect the housing for debris, insert the new filter with the arrows facing the correct direction, reattach the housing, and run the HVAC on max to seat the filter. While steps can vary by year, the core actions are consistent. This overview helps you mentally prepare for the step-by-step instructions that follow and ensures you have the right filter before you begin.
Common mistakes and how to avoid them
Common mistakes include installing the filter backward, confusing the orientation arrows, or leaving dust behind in the housing. Rushing the glove box replacement can damage the panel or clip. Always double-check the filter orientation and ensure the housing is seated firmly. If you notice reduced airflow after replacement, re-check that the filter is properly seated and that no debris is blocking the housing.
Maintenance tips after replacement and when to replace next
After installing a new filter, run the HVAC on high for several minutes to seat the filter and remove any loose dust. Keep an eye on the airflow and odor in the cabin; if airflow decreases or odors return, inspect the housing for damage or misalignment and replace the filter again as needed. Document the replacement date and set a reminder aligned with your driving conditions, such as heavy city traffic or outdoor pollutants.
Tools & Materials
- Cabin air filter (compatible with your RAV4)(Choose OEM or reputable aftermarket; carbon option for odor control if needed)
- Safety gloves(Protect hands from dust and debris)
- Screwdriver (Phillips or flathead)(Only if your filter housing is secured with screws)
- Small flashlight(Helps inspect the housing in dark interiors)
- Microfiber cleaning cloth(Wipe away dust from the glove box and vent area)
Steps
Estimated time: 20-40 minutes
- 1
Prepare the workspace
Park the vehicle on a flat surface, turn off the engine, and engage the parking brake. Gather your replacement filter and cleaning supplies so everything is within reach. This reduces the risk of dropping parts or losing small screws.
Tip: Have a trash bag handy to dispose of the old filter immediately. - 2
Access the filter housing
Open the glove box and release the limiter stops so the box can drop down enough to expose the filter housing. If there’s a cover panel, remove it to reveal the filter slot.
Tip: A flashlight can help you see the housing latch and any screws that secure the panel. - 3
Remove the old filter
Carefully remove the old filter, noting the orientation of the arrows. Check the housing for debris or damage and wipe with the microfiber cloth if needed.
Tip: Take a quick photo of the old setup to reference orientation for the new filter. - 4
Clean the housing
Inspect the housing for dirt and debris. Use the cloth or a soft brush to remove buildup. Ensure the area is dry before installing the new filter.
Tip: Avoid using water; moisture can promote mold growth inside the housing. - 5
Install the new filter
Insert the new filter with the airflow arrows pointing toward the blower motor as indicated on the filter. Ensure the filter sits flat and fully covers the opening.
Tip: If the filter has a carbon layer, place it so the carbon side faces inward toward the HVAC system. - 6
Reattach the housing
Replace the housing cover or screws, then close the glove box. Make sure there are no loose parts and that the glove box closes properly.
Tip: Do not overtighten fasteners; this can crack plastic clips. - 7
Test the HVAC system
Turn on the car and run the blower on high for several minutes to seat the filter and confirm proper airflow. Check for unusual odors or noises.
Tip: If airflow seems weak, re-check filter orientation and reseat the housing.
FAQ
How often should I change the cabin air filter in a RAV4?
Check your owner’s manual for the recommended interval. If you drive in dusty environments or frequently encounter odors, inspect the filter more often and replace it when it looks dirty or smells bad.
Check the manual for your Rav4’s recommended interval, and inspect the filter if you drive in dusty areas or notice odors.
Can I use a carbon cabin air filter in my Rav4?
Yes. A carbon-activated cabin filter provides better odor control and can help reduce smells from smoke or pollution, though it may be slightly more expensive and could have different airflow characteristics.
Yes, carbon filters help with odors; they may cost a bit more but are often worth it for urban or smoky environments.
Do I need special tools to change the filter?
Most Rav4 models only require hands and a replacement filter. Some trims may use a small screwdriver to remove a panel. Always check your year/model and take care not to damage clips.
Usually none, but a small screwdriver may be needed for some trims.
Will replacing the filter improve HVAC performance?
Yes. A new filter restores airflow, improves defogging performance, and can help the AC/heater run more efficiently by reducing resistance in the ductwork.
Replacing the filter can improve airflow and HVAC efficiency.
What if I can’t locate the filter housing?
Refer to your owner’s manual or trusted guides from Air Filter Zone. The housing is commonly behind the glove box or under a plenum panel; ensuring you locate it prevents forcing parts or damaging clips.
If you can’t find it, check the manual or Air Filter Zone’s guidance; it’s usually behind the glove box.
What is the correct orientation for the new filter?
Look for arrows on the filter housing and the filter itself. Align the arrows toward the blower motor so air flows through the filter correctly.
Align the arrows toward the blower motor when you install the new filter.
Watch Video
Quick Summary
- Know where the RAV4 cabin filter lives in your year/model
- Choose the right filter type for your needs (standard vs carbon)
- Install with correct orientation and a secure housing
- Test the HVAC to confirm proper seating and airflow
- Document the replacement date for future maintenance