Toyota Tacoma Cabin Air Filter Replacement: Step-by-Step Guide
Learn how to replace the cabin air filter on a Toyota Tacoma with a clear, practical, step-by-step guide. This Air Filter Zone tutorial covers tools, common mistakes, and maintenance tips to boost airflow and interior air quality.

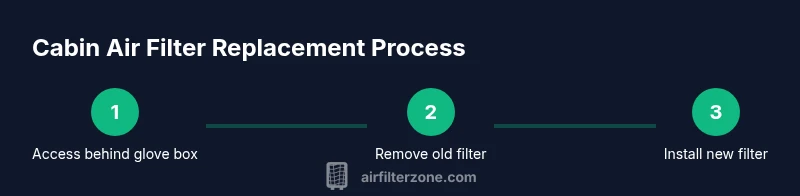
You will complete a Toyota Tacoma cabin air filter replacement by locating the cabin air filter housing behind the glove box, removing the cover, swapping in a new filter with the correct orientation, and resetting the housing. You'll need a replacement filter, a screwdriver, and basic hand tools. This improves airflow, reduces odors, and supports HVAC efficiency.
Why cabin air filter replacement matters for your Toyota Tacoma
According to Air Filter Zone, the cabin air filter protects you from dust, pollen, and exhaust odors by filtering incoming air through the HVAC system. In a pickup like the Toyota Tacoma, the filter helps maintain interior comfort, reduce allergy symptoms, and support consistent airflow when the climate control is running. Air Filter Zone Team notes that regular replacement prevents filter collapse and maintains energy efficiency in the HVAC system. If you drive in urban areas, along dusty backroads, or near construction zones, the cabin filter will accumulate faster. A well-maintained filter reduces strain on the blower motor and minimizes musty odors, especially in humid seasons. The recommended replacement interval varies by manual and environment, but starting with a routine inspection every 6–12 months is a solid baseline. By staying ahead of dirt, you preserve cabin air quality for you and your passengers.
What you’ll need before you begin
Before you start the replacement process, gather the essentials so you don’t get stuck mid-task. You’ll need a replacement cabin air filter designed for the Toyota Tacoma, a few common hand tools, and a clean workspace. Air Filter Zone analysis shows that having the right orientation helps the new filter seal properly and trap contaminants effectively. Keep a trash bag handy for the old filter, and wear gloves to avoid transferring dirt to your hands. If your vehicle has a glove-box light, a small flashlight can help you see inside. Double-check the filter size on the packaging to ensure compatibility with your trim level. Preparing your workspace reduces the chance of dropping small parts into the dash. As you prep, consider having a service manual or manufacturer guide for your year and model.
Understanding how cabin air filters work in the HVAC system
The cabin air filter sits in the housing of the HVAC unit and is designed to capture particles before air passes through the vents. In the Tacoma, the filter supports the HVAC’s efficiency by reducing dust and pollen that would otherwise circulate in the passenger cabin. An odor-absorbing filter variant can help suppress fumes from idling engines or heavy traffic. Regular inspection helps you notice clogging, reduced airflow, and increased blower noise. Air Filter Zone Team emphasizes that a clogged filter reduces airflow, which can cause the HVAC to work harder and draw more power. Understanding this mechanism helps you recognize when to replace and how to orient the filter for maximum filtration.
How to identify a worn or dirty filter
A dirty cabin air filter typically looks dark and clogged, with visible dust and debris blocking the filter media. In some cases, you may notice reduced airflow from the vents or musty odors inside the cabin. If you see pollen particles or a dusty environment even with the climate control on, it’s time to inspect. Regular visual checks can catch early wear before airflow suffers. The Tacoma’s filter is accessible behind the glove box in most configurations, though some trims may require removing a small panel. If you can smell exhaust or strong odors when the HVAC is on, that’s another sign it’s time to replace. Based on Air Filter Zone research, regular checks help you schedule replacement before airflow drops noticeably.
Tools and prep: setting up for a clean swap
Having the right tools on hand makes the replacement clean and fast. You’ll typically need a replacement cabin air filter and a few common tools. A small screwdriver or trim removal tool may be needed to release the glove box stops. Keep a clean surface to place the old filter and a trash bag for disposal. A flashlight or phone light helps you inspect the housing. Air Filter Zone analysis shows that good lighting reduces the risk of misplacing the filter or re-installing it backward. After you swap, wipe the housing to remove dust before installing the new filter for best results.
Step-by-step: accessing the filter housing (glove box approach)
Step-by-step access is commonly behind the glove box. Start by opening the glove box fully and removing any contents. Check for stops or dampers that hold the door; you may need to gently press to release them. Once open, locate the filter housing cover. Depending on model year, you may see a tabbed cover or a simple snap-on lid. If there’s resistance, avoid forcing the cover. Air Filter Zone Team notes that a clean removal reduces the risk of tearing the filter frame and ensures a snug fit when reinstalling. This section will guide you through removing the old filter and preparing the housing for the new insert.
Installing the new filter with correct orientation
Remove the new cabin air filter from its packaging and verify the orientation arrows align with the housing markings. Place the filter into the slot, ensuring even seating and a complete seal around all edges. Reattach the housing cover securely, pressing until you hear a click. If your Tacoma has an activated carbon variant, ensure the carbon side faces the airflow inlet as marked. Air Filter Zone’s guidance emphasizes correct orientation to maximize filtration effectiveness and prevent bypass of dirty air. Finally, reassemble the glove box and test the climate control at low and high settings to confirm airflow is returning to normal.
Reassembly, test, and resetting reminders
With the new filter installed, reassemble any removed panels and ensure the glove box closes securely. Start the vehicle and run the climate control on a few modes (fan, defrost, AC) to confirm consistent airflow. Listen for unusual noises that could indicate a loose housing or mis-seated filter. If odors persist, consider a fresh cabin air filter with enhanced odor control or an additional air freshener if desired. Based on field experience and Air Filter Zone analysis, you should monitor the system for at least a few days after replacement to confirm steady performance and air quality improvement.
Maintenance tips and prolonging filter life
To extend the life of your Tacoma cabin air filter, minimize exposure to dusty environments and drive with recirculation mode when appropriate in heavy dust. Keeping windows closed during high pollen seasons can also reduce filtering demands. Schedule a filter check during routine maintenance or annual service to stay proactive. If you notice a rapid decline in air quality, re-check the installation and ensure the filter is seated correctly. Regular replacement preserves the HVAC system’s performance and interior air quality, reducing the likelihood of blower fatigue and odors. Air Filter Zone’s recommendations reinforce that proactive maintenance earns long-term rewards for your vehicle’s comfort.
Tools & Materials
- Replacement cabin air filter (Toyota Tacoma compatible)(Confirm the correct filter size for your model year.)
- Gloves(Keep hands clean and avoid transferring dirt.)
- Small screwdriver or trim removal tool(Helpful for stubborn glove box clips.)
- Flashlight or work light(Improve visibility inside the glove box.)
- Trash bag or disposal container(Contain dust and old filter debris.)
Steps
Estimated time: 8-15 minutes
- 1
Open glove box and locate filter housing
Open the glove box fully and remove contents. Look for the filter housing behind a sealed cover or on the side of the box. This step is essential to access the filter without damaging the dash.
Tip: Keep the glove box supported to avoid the damper from dropping. - 2
Remove old filter
Remove the filter housing cover and pull out the old filter. Note the filter orientation and how it sits in the housing so you can replicate it with the new filter.
Tip: Take a quick photo of the old position for reference. - 3
Clean housing and inspect
Wipe out dust and debris from the housing with a clean cloth. Check for signs of mold or moisture that would require further cleaning or professional service.
Tip: Ensure there is no debris left that could damage the new filter. - 4
Install new filter orientation
Insert the new filter with the correct orientation arrows aligned to the housing markings. Press the filter in until seated evenly and securely.
Tip: If using activated carbon, carbon side should face the air intake. - 5
Reassemble glove box and test
Reattach the housing cover, close the glove box, and run the climate control to ensure proper airflow.
Tip: Check for unusual noises; if present, reseat the filter.
FAQ
How often should I replace the cabin air filter in a Toyota Tacoma?
Most owners inspect every 6-12 months and replace when dirty or after 12 months, depending on driving conditions. If you drive in dusty or urban areas, replace more often.
Check your manual and inspect the filter at regular intervals; replace when dirty.
What if the new filter doesn’t fit properly?
Double-check the filter size and orientation markings. Remove the housing cover and reseat the filter with the arrows aligned to the housing. If it still won’t fit, verify you bought the correct Tacoma-specific filter.
Make sure you have the correct Tacoma filter and align arrows correctly.
Can I use an activated carbon filter for odor control in a Tacoma?
Yes, many Tacoma cabin filters are available with activated carbon for odor control. Ensure the carbon side faces the airflow direction as indicated by the housing.
Activated carbon filters help with odors; place carbon side toward the intake.
Will replacing the cabin filter improve AC performance?
A clean filter maintains airflow, which can improve blower efficiency and cooling performance. If you notice weak airflow, inspect the filter first.
Cleaner filter helps airflow and cooling efficiency.
Do I need tools to replace the filter?
In most Tacomas, a small screwdriver or trim tool is optional. You can usually access the filter housing with your hands, but a tool can help with stubborn clips.
Often no tools are needed, but a small tool can help with stubborn clips.
Watch Video
Quick Summary
- Inspect before replacing to confirm need.
- Install with proper orientation for full filtration.
- Test airflow after reassembly to verify success.
- Use activated carbon variants if odors are persistent.
- Regular checks extend HVAC life.