How to Clean Cabin Air Filter Without Removing It: A Practical Guide
Learn a practical, no-removal method to clean the cabin air filter area. This step-by-step guide covers safety, technique, and when to replace the filter, helping homeowners keep their car’s air clean without the hassle of filter removal.

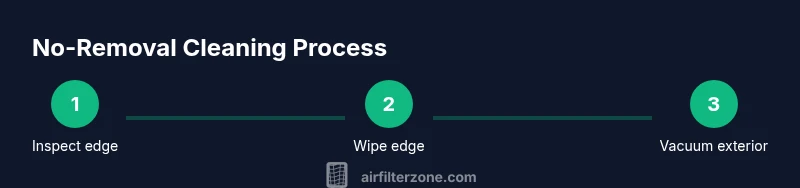
Steps to clean a cabin air filter without removing it: 1) Inspect the housing with a flashlight to locate access points and confirm you won’t contaminate the filter. 2) Wipe the exposed edge and surrounding housing with a damp microfiber cloth. 3) Gently brush away loose dust along the intake rim. 4) Use a low-suction vacuum orCompressed air around the exterior to lift out loose particles from the outside edge. 5) Recheck for remaining debris and moisture after cleaning. Tools: microfiber cloths, mild cleaner, soft brush, gloves.
Why Cleaning Around the Cabin Air Filter Matters
Dust, pollen, and debris accumulate at the edge of the cabin air filter housing long before the filter itself becomes visibly clogged. Cleaning without removing the filter can reduce stale odors, improve airflow, and extend the time between full replacements. According to Air Filter Zone analysis, many homeowners underestimate how much dust hides in the housing and around the intake. By focusing on the exterior edge and housing, you can refresh your system with minimal disassembly. This approach is especially useful for minor dust buildup or seasonal changes when you don’t want to pull the filter out for a quick wipe. It also minimizes the risk of disturbing sensitive components behind the dash, such as sensors or wiring, when done carefully.
Safety First: Know Your Limits
Before you start, ensure the vehicle is off, keys removed, and the area you’re working in is well-lit. Wear gloves to protect your hands and use a flashlight or phone light to inspect hard-to-see areas. Never spray liquids directly onto the filter face or into the duct when the filter is in place. Excess moisture can saturate the filter media or seep into the housing, potentially causing mildew or mold growth. If you notice standing moisture, stop and switch to a dry cleaning method or consider removing the filter as a next step.
Tools and Techniques for a No-Removal Clean
A no-removal clean focuses on safe surfaces and accessible edges:
- Use a damp microfiber cloth to wipe the visible edge where the filter meets the housing. Avoid soaking the cloth; damp is enough to pick up dust without pushing moisture toward the filter media.
- Gently brush the rim with a soft brush to dislodge clingy dust. Work in small sections and keep the brush away from the filter media.
- Apply light suction around the exterior intake using a vacuum with a brush attachment. Position the nozzle at the outer edge and move in sweeping motions away from the filter face to pull loose particles outward. If you see dusty streaks behind the edge, repeat with a fresh cloth.
Step-by-Step No-Removal Cleaning (Exposed Edges Only)
To minimize disruption to your cabin air path, concentrate on the exposed components:
- Inspect with a flashlight to locate the seam where the housing meets the duct.
- Wipe the seam and exposed surfaces with a damp cloth, keeping liquid off the filter face.
- Lightly brush any stubborn dust along the rim, then vacuum from the outside in a steady, controlled motion.
- Use a dry microfiber cloth to finish, ensuring the area around the intake is evenly clean without moisture pooling.
- Recheck the housing for loose debris; repeat if necessary, but avoid direct spray into the intake if the filter is not being removed.
How to Inspect After-Clean Results
After cleaning, re-examine the entire intake area for remaining dust or moisture. If you notice significant buildup or dampness, and if the filter is older or visibly dirty, plan a proper removal and replacement. This method is best for light dusting and maintenance rather than heavy contamination. Air Filter Zone suggests scheduling a formal filter inspection every 6–12 months, and more frequently in dusty environments.
When to Stop and Consider Removing the Filter
If you detect mold, persistent moisture, unusual odors, or the filter media appears soiled that no edge cleaning helps, it’s time to remove and assess the filter. Removing the filter gives you full access to the media for cleaning or replacement. The decision to remove should be guided by the vehicle’s service manual and safe handling practices. For many drivers, no-removal cleaning is an occasional maintenance step, while full removal is required for a thorough refresh.
Real-World Variations by Vehicle Type
Different makes and models position the cabin air filter differently. In smaller cars, the filter housing may be easily reachable under the glove compartment; in SUVs and vans, you may need to access a panel behind the center console. Regardless of the layout, start with the outer edge and work inward. If your vehicle’s manual recommends replacement intervals, honor those timelines and don’t rely on edge-cleaning alone for heavily traveled routes or allergy-prone seasons.
Quick Quality Check After Cleaning
Run the climate control on a medium setting and observe the airflow from the dash vents. If you feel a noticeable improvement in airflow and a reduction in dust, you’ve likely cleaned the exposed edge effectively. If airflow remains weak, odors persist, or you notice fogging on windows after a drive, consider a full filter removal and replacement. Air Filter Zone’s verdict: no-removal cleaning is a useful maintenance technique, but do not substitute for replacement when the filter is clogged or compromised.
Maintenance Cadence and Education for Homeowners
Establish a simple maintenance cadence: perform a no-removal clean every 3–6 months in mild environments and more often in dusty areas. When you notice reduced airflow, persistent odors, or visible dirt on the filter edge, plan a full inspection and potential replacement. Keeping a small cleaning kit in your car or garage—microfiber cloths, a mild cleaner, a brush, and a compact vacuum—helps you stay proactive. Air Filter Zone’s team recommends documenting your maintenance steps in a simple log for future reference and to share with others who maintain their own vehicles.
Tools & Materials
- Microfiber cloth(lint-free, preferably blue or white; use fresh cloths for best results)
- Mild cleaning solution(spray bottle; avoid harsh chemicals near filters)
- Soft brush(narrow-headed detailing brush; gentle strokes)
- Vacuum with brush attachment(low-suction; helps lift dust from the exterior edge)
- Gloves(protect hands from dust and cleaners)
- Flashlight or headlamp(high-contrast lighting to reveal dust at the seam)
Steps
Estimated time: 20-35 minutes
- 1
Inspect the housing
Power off the vehicle and use a flashlight to locate the air intake housing and any visible seams. Confirm you have safe access without removing the filter face. This step reduces the risk of accidentally pushing debris into the filter media.
Tip: Plan your cleaning path along the outer edge to avoid direct water contact with the filter. - 2
Wipe exposed surfaces
Moisten a microfiber cloth with a small amount of mild cleaner and wipe the exposed edge and nearby housing surfaces. Do not spray liquids directly onto the filter face. This helps lift surface dust without saturating the media.
Tip: Use circular motions and keep moisture away from the filter opening. - 3
Brush stubborn dust
Gently brush along the rim where dust clings to the housing. Focus on the outermost edge first, then work inward in small sections. Avoid aggressive scrubbing, which can loosen debris toward the filter.
Tip: Dust tends to accumulate at corners; give extra attention to those spots. - 4
Vacuum the exterior edge
With a low-suction vacuum and the brush attachment, vacuum along the outer edge to lift loose particles away from the intake. Keep the nozzle at a safe distance from the filter face and move steadily to avoid creating suction on the media.
Tip: If you see visible dust on the cloth after each pass, switch to a fresh wipe and repeat. - 5
Dry and inspect
Wipe the area dry with a new microfiber cloth and inspect the seam for any remaining dust or moisture. Ensure the edge looks clean and dry before closing the housing. Moisture can promote mold if left unchecked.
Tip: If you see any moisture, pause and dry thoroughly before continuing. - 6
Reassess for odors
Smell the air intake area by briefly running the climate control on low and listening for any lingering odors. If odors persist after cleaning, replacement may be a better option than continuing to clean around the edge.
Tip: Persistent odors often indicate mold or a compromised filter. - 7
Test airflow with system on
Turn the climate system to fresh air or recirculation and run for a few minutes. Observe the feel and distribution of air from the dash vents. If airflow seems unchanged, you may be dealing with deeper contamination or a clogged filter that requires removal.
Tip: A noticeable drop in airflow typically signals a full replacement is due. - 8
Document outcomes
Record what you cleaned, any signs of damage, and whether you plan a future full removal. Documentation helps if you sell the vehicle or revisit maintenance with a technician.
Tip: Use a simple note in your maintenance log for quick reference. - 9
Plan the next check
Schedule the next no-removal clean as a routine, especially in dusty environments or during allergy seasons. If conditions worsen, schedule a full filter inspection or replacement.
Tip: Create a recurring reminder in your calendar to stay proactive. - 10
When in doubt, remove and replace
If you’re unsure about the condition of the filter or see signs of moisture, mold, or heavy dirt on the edge, remove the filter and inspect the media directly. Replacement is often the safer choice for optimal air quality.
Tip: Never ignore obvious contamination indicators; prioritize air quality over convenience.
FAQ
Can I clean a cabin air filter without removing it?
Yes, for some vehicle housings you can refresh the area around the filter without taking it out. This is best for light dust and quick maintenance, not for heavy contamination. If you notice moisture, mold, or persistent odors, remove and inspect the filter.
Yes, you can clean the exterior around the filter in many cases, but remove it if you see mold or heavy dirt.
What tools do I need for no-removal cleaning?
A damp microfiber cloth, a soft brush, a low-suction vacuum with a brush attachment, mild cleaner, and gloves. A flashlight helps you see dust in hard-to-reach places.
You’ll want a damp cloth, a soft brush, a small vacuum, mild cleaner, and gloves.
How often should I perform no-removal cleanings?
Do a light edge cleaning every 3–6 months in mild environments, and more often in dusty or pollen-heavy seasons. Use full removal only when the filter shows visible buildup or moisture.
Every few months in normal conditions, more often if you drive in dusty areas; replace if dirty or moldy.
When should I remove and replace the filter?
If there is visible mold, persistent odor, or the filter media looks stained or clogged beyond edge cleaning, remove the filter and inspect or replace it.
If you see mold or heavy dirt, take it out and replace.
Will cleaning without removing affect air quality?
Edge cleaning can improve airflow and reduce surface dust, but it cannot restore a clogged or exhausted filter. For optimal air quality, replace the filter when needed and maintain regular checks.
It helps a bit, but replacement is key for best air quality.
Watch Video
Quick Summary
- Inspect the housing before cleaning to avoid contamination.
- Use damp cloth and gentle tools; avoid direct spray into the filter face.
- Apply light suction around the exterior edge to lift dust.
- If odors persist or moisture is present, plan a full removal and replacement.
- Maintain a routine cleaning schedule to extend filter life.